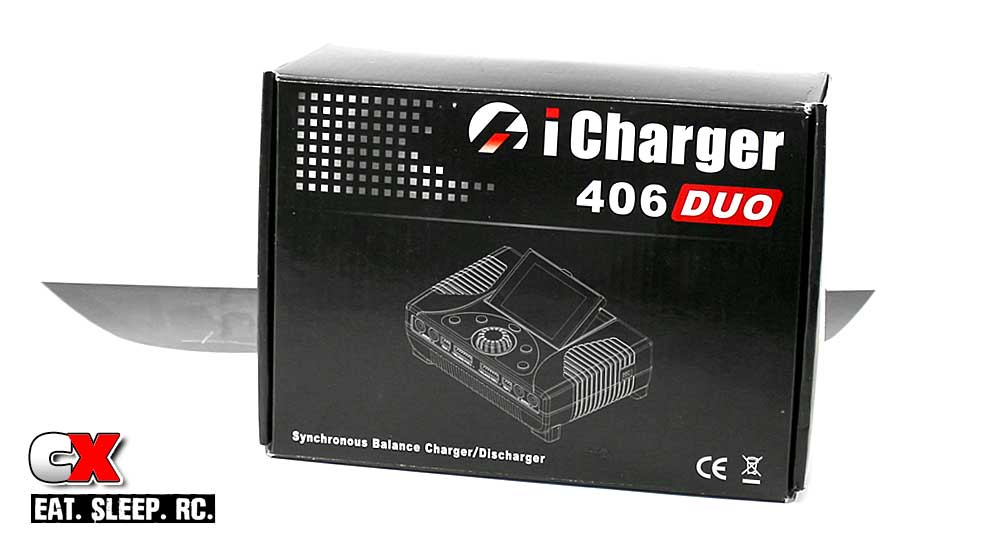
Pushing Your Packs to the Limit
In the RC racing world, battery charging has become a science that can mean the difference between going fast and just going. The vast majority of chargers have a charge rate capped around the 12A mark, an area deemed safe for most applications. As battery technology progresses, however, so should the chargers, like the Progressive RC 406DUO iCharger we have here. Not only is this a feature-loaded compact unit, it also boasts a max charge rate of 40A per channel. Yes, you read that right – two channels, 40A a piece. Think that’s impressive? Well, if you want to super-size the output of your packs, you can combine both channels to charge 1 LiPo battery at a 70A charge rate. Ya. CRAZY! For this reason (among others, I’m sure), the 406DUO is the preferred charger at local tracks where racers are trying to squeeze every ounce of power out of their stock-class buggies and trucks. Time to up my battery charging game…
Product: Progressive RC 406DUO iCharger
Part Number: 406DUO
Cost: $299.99
Type: Charger/Discharger/Balancer
Input Voltage: 10-30v DC
Charge Rate: 5mA – 40A per channel (up to 70A in synchronous mode)
Battery Type: NiCd, NiMh, LiPo, LiFe, Lilo and PB Batteries
Cell Count: 1-25 NiCd/NiMh, 1-6 Lithium, 1-18 PB
Discharge Rate: Max 80W per channel (up to 140A in synchronous mode)
Display: Top mounted, tilting 2.8″ LCD screen
Additional Ports: Mini USB 2.0 port, USB charging 5V 1A, 64 user presets
What’s In The Box
The Progressive RC 406DUO iCharger comes in a compact box with everything you need to start charging. The unit itself it securely wrapped in large foam blocks while the accessories are inserted around it. Speaking of accessories, Progressive RC has included an iCharger power cable, dual-channel balance board, balance wires and output cables and a small CD that contains the user’s manual and additional software. Here’s the unboxing video for a better look at what’s inside.
 The Charger
Progressive RC’s 406DUO iCharger is surprisingly small when removed from the box, mainly because it’s just the charger; you need an external power supply for it to work. Progressive also ‘colors’ their chargers for easy identification; grey and blue for the 4010, blue and light blue for the 308 and grey and orangey for the 406. As you can see, we have the grey and orangey one.
 External
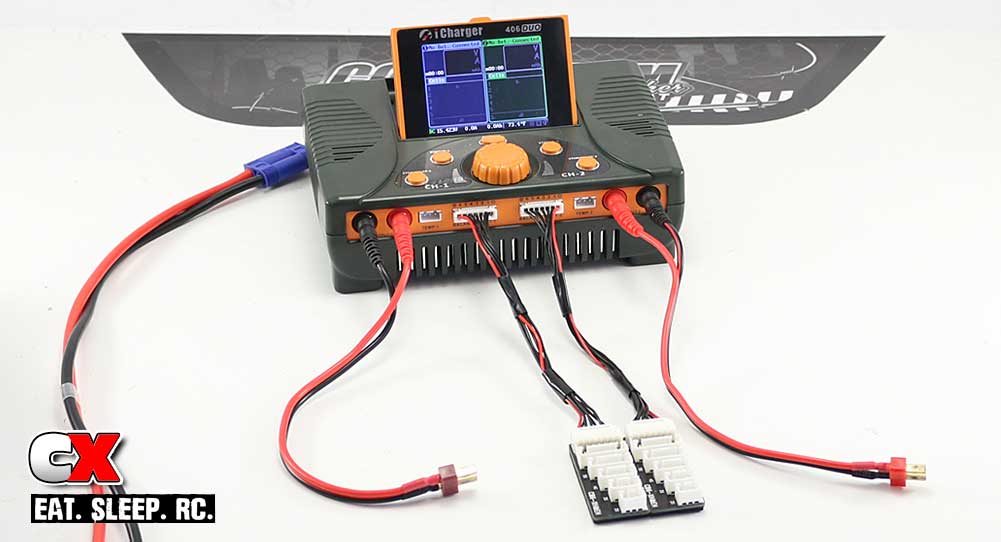
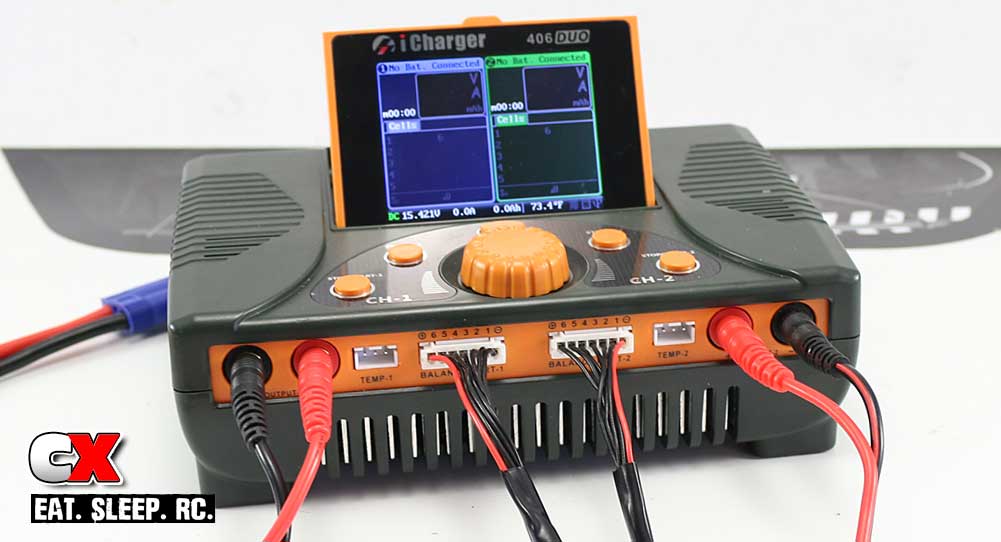
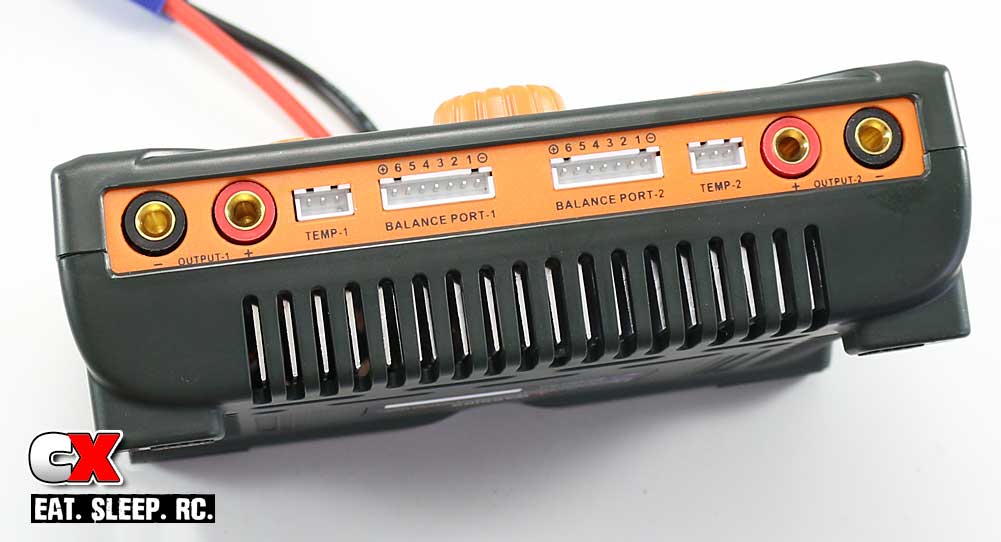
Circling around the unit, the front face is split up into two sides (for both channels), each having output plugs, a temperature port and a balance port. While the 406DUO doesn’t come with a temp sensor, it’s nice to have this function available if you choose to use it.
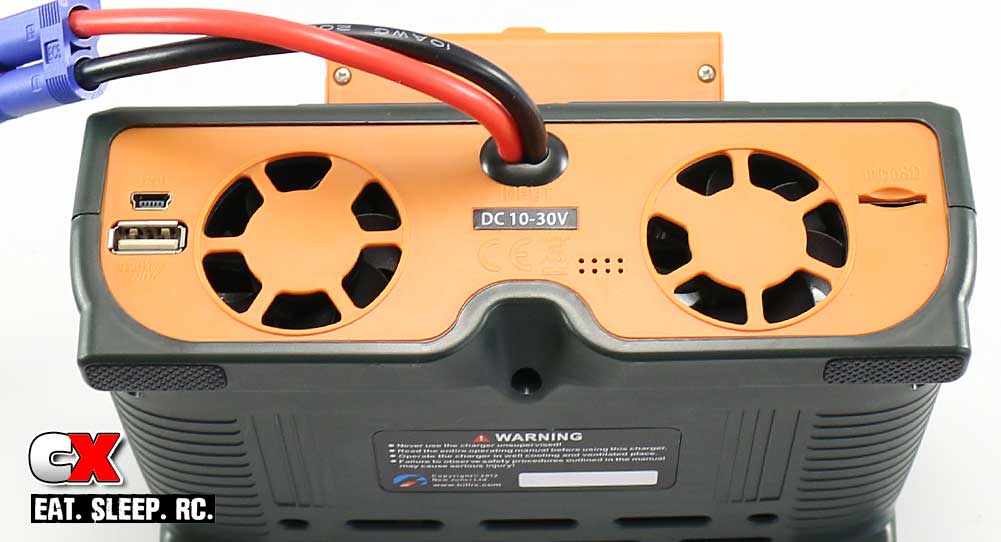
Along with the power cord, the back side of the charger features a USB port, mini USB port and SD card slot. A pair of large fans are mounted here as well to help keep the internals cool when the high charge rates heat things up.
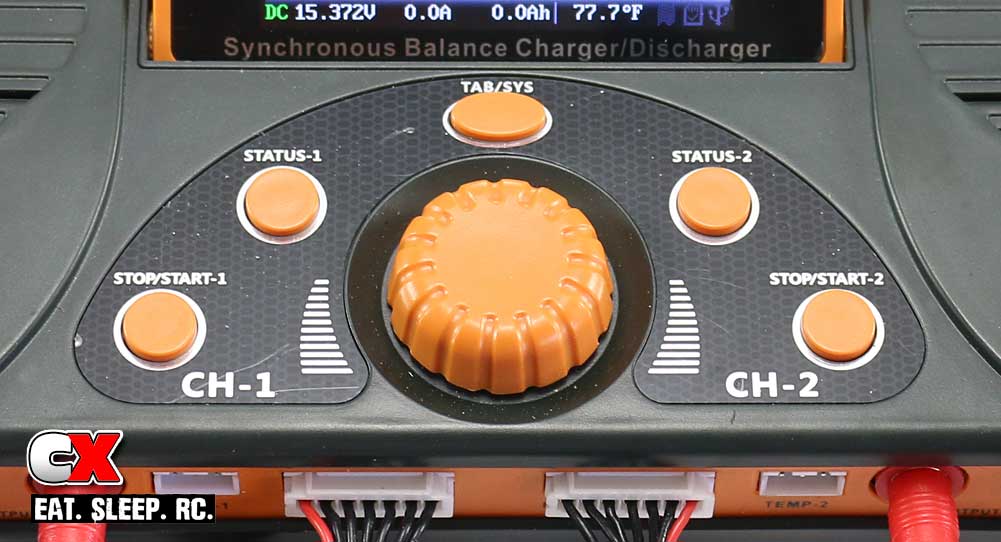
The top of the unit is where all the functionality takes place. There are 5 buttons in an arc; channel 1 Start/Status, channel 2 Start/Status and the Tab or System button. There’s also the rotating function knob, used to file through the menu and complete any changes. A tilting 2.8″ LCD screen is mounted flat just above the buttons.
 Internal
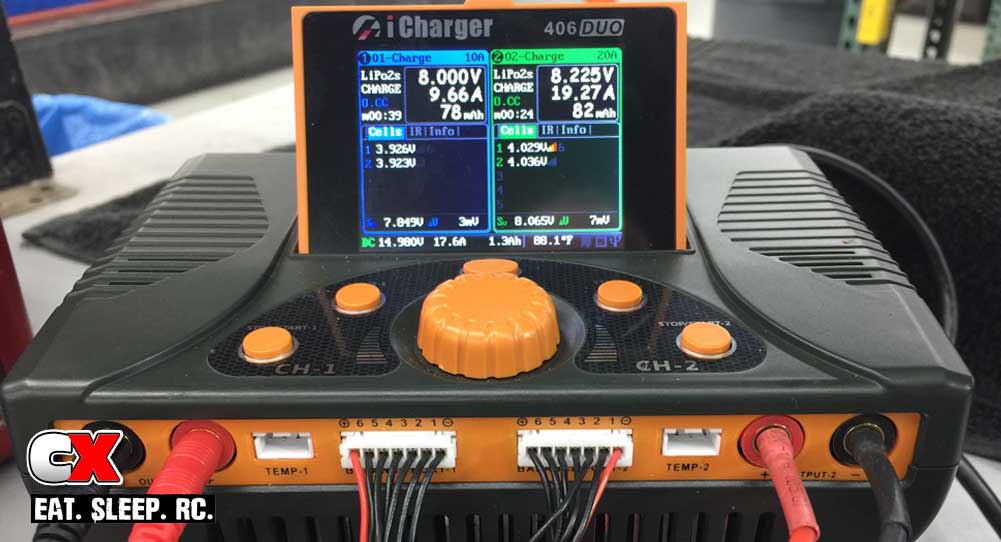
The 406Duo is a dual channel charger, meaning you can charge two batteries at a time. Upon bootup, you are greeted with a start screen and a couple tones followed by the color home screen which has been split up into two sides, one for each channel.
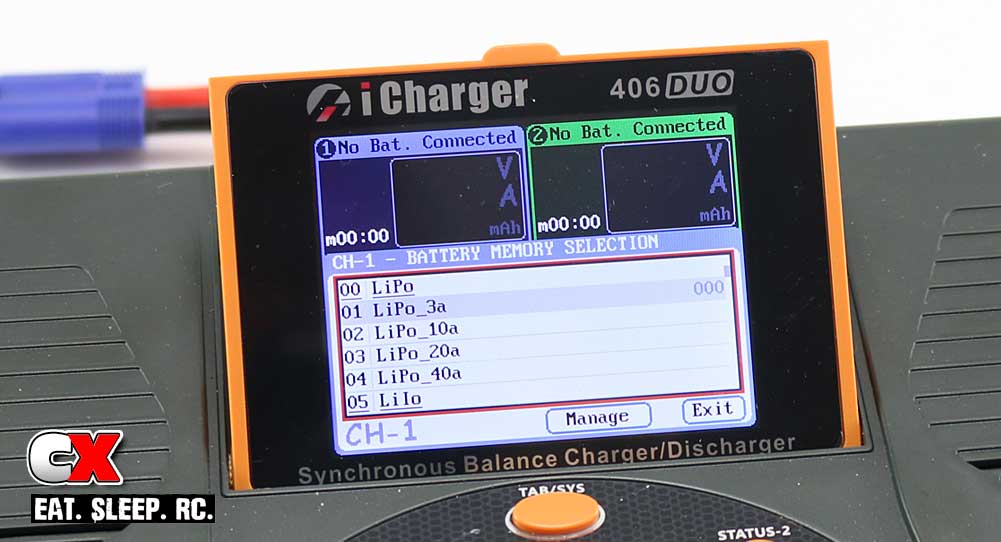
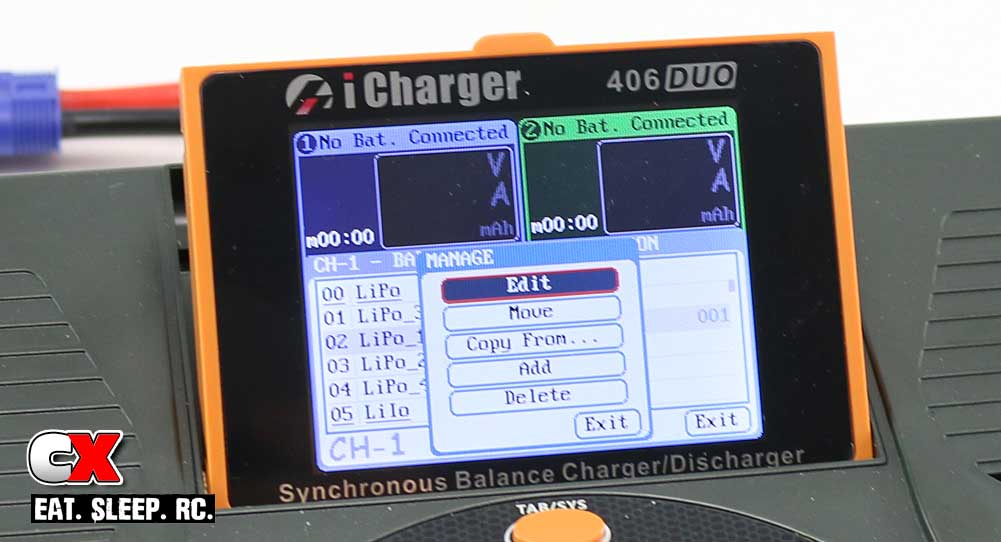
From here you can just jump right in and start charging with any of the iCharger’s preset charge modes (such a cool idea, by the way), or you can take a few minutes and configure a couple presets of your own (there’s 64 preset slots to fill). Note that the pre-loaded presets may not be exactly what you want and, unfortunately, they’re only slightly customizeable, so I would suggest creating one or two of your own to fine-tune your charging.
So, how do you do create you own? Well, the manual easily walks you through the process, however a hard copy of that manual is not included in the box. Instead, you have to insert the CD and open it up or, like I did, just go to their website and pull it up there. This was a minor inconvenience since I had to bring my charger, power supply and accessories into my office, but it’s really only for the initial setup so to me it wasn’t that big a deal.
 Once you’ve settled, simply use the TAB (or SYS) button, dial knob and Start/Stop/Status buttons to create a LiPo, NiCd, LiFe or any other type of presets. I made one for LiPo 3A (for my drone packs), LiPo 10A, LiPo 20A and LiPo 40A, however with a whopping 64 user presets, you can go nuts creating multiple program types to charge, store, discharge or cycle your packs. Once you’ve created these, it’s super easy to select them and start charging.
There is also a 406DUO parameters area. This section allows modification of the charger’s settings like the temperature and fans, beep tones, screen brightness and contrast, power output and language. You can also load or save charger Configuration files from this area (off of the SD card).
 Additional Features
Race-level chargers are gaining the ability to pump the packs at rates upwards of 20A. As I mentioned earlier, the 406DUO can hit each bank at up to 40A. One of it’s more interesting features is its Channel Synchronous Mode. This mode allows you to combine both channels to charge one LiPo, boosting the maximum charge rate to 70A! WOW! This monster charge rate can fill your LiPo with go juice in about 6 minutes (depending on the pack)! This will also create a lot of heat in it, so care should be taken when the pack has finished charging.
Also hidden deep in the charger settings are a Log Files Manager and Servo Tester. The servo tester is cool; it has a Liner Test, Fixed Point Test, Speed Test and Auto CW/CCW Test. I haven’t tried these yet but they appear to test all functions of your servo to check its condition.
 Performance
Since almost all of my chargers are AC/DC, the first order of business with the iCharger was finding a power supply. I packed away a TrakPower 25A 12V Racing Power Supply some years ago since I didn’t really need it – good thing I kept it.
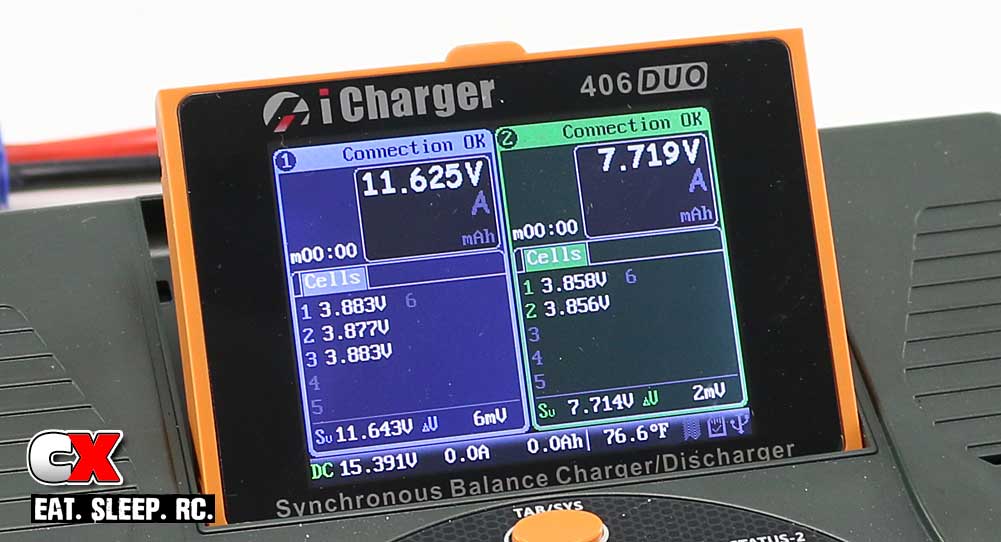
Charge setup is very easy; plug in the balance boards and charge leads (remember, red to red, black to black) and flip the switch on the power supply – Bam – done!
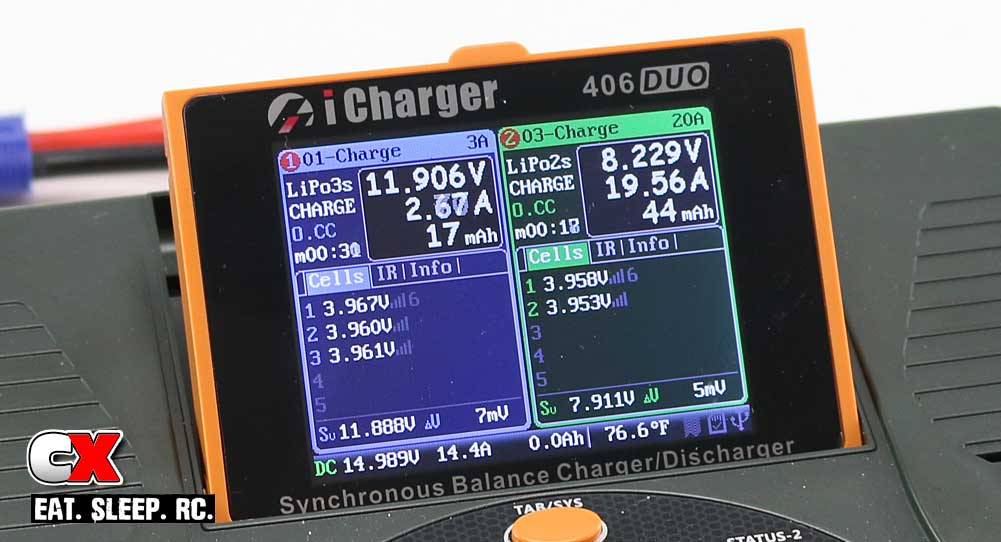
After setting up the charger, I proceeded to start my first charge on both channels using the presets I created – the left channel using LiPo 3A and the right channel set to LiPo 20A. I hooked up the batteries and selected the right channel by pressing the right Start/Stop button (or pressing the dial knob and selecting the right channel) – she’s ready to fire, captain!
To start the charge, simply press the dial knob, select your charge preset, then press the dial knob two more times to confirm. Once you’ve used it a couple times, you’ll get very comfortable with the press-select-confirm-confirm functionality.
The charger will begin it’s charge ramp-up process and you’ll immediately see stats flowing onto the screen. During this time, you’ll be flooded with displayed data on each channel, stuff like battery type, channel status (charge, discharge, etc), program time, charge voltage, current and capacity – there’s really alot to take in. The best part is that all the pertinent data is available right there, no flipping to other screens to find out what’s going on. However, for those of you that want to see additional stats (cell IR, for example), you can hit the STATUS button for the appropriate channel and it will be displayed.
 Prior to having an iCharger, the highest rate I could charge at was 12A. While moving to 20A isn’t a huge jump, I did notice a bit more grunt while rounding the track in my 17.5T equipped Team Associated B6. Charge times also dropped, allowing me to get more packs in on practice day that I did prior.
My next step was the 30A charge rate, and here is where I started to see some big improvements. After cycling through the 30A charge rate about 10 times, I noticed a significant low-end power increase, mostly when approaching jumps with very short run-ups. Speed on the straights seemed faster as well, thanks in part to the enhanced grunt out of the corners.
My final test was giving my buggy a go at the 40A charge rate. After 5 or so packs at 30A, I didn’t notice much increase going to 40A. However, in the grand scheme of things, there is a definitely a substantial boost in power from 12A to 30A, so going from 12A to 40A you’ll probably see huge gains.
Now some of my packs are a bit old, so simply hooking them up and blasting them at 40A probably isn’t a good idea. I increased the rate in small increments; 12A to 20A, 20A to 25A, 25A-30A etc all the way to 40A. I’m still not 100% comfortable with this process yet, however any new packs will get a 40A treatment right from the start.
Conclusion
There’s no denying that Progressive RC’s 406DUO iCharger definitely puts a check in all the boxes when it comes to features. I love the small size, however needed to haul around a power supply now sort of defeats the purpose of its small size. It’s not that big a deal, though, as the benefits outweigh this minor inconvenience. One of my favorite features, though, is the 64 user presets – that’s more model memory than my Futaba 4PX radio system! I also dig the boost in performance – 20A (and 40A) charge rates really wake the packs up and help them deliver some great power. I really thought the menu would be a downfall but it’s actually quite easy to navigate once you’ve used it a couple times. All in all, I’m extremely impressed with the 406DUO iCharger and have moved it up the ranks to my main track charger. Great job Progressive RC!
Features: 10
Menu System: 9
Appearance – Fit & Finish: 9.5
Value: 10
Price: 9
Connect
Progressive RC, www.progressiverc.com