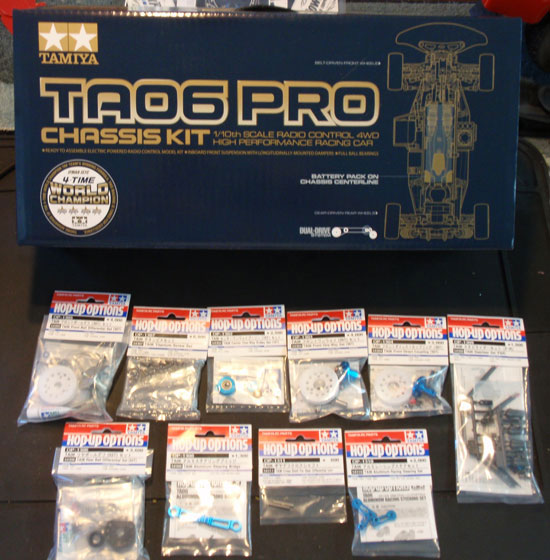
For the next week or so, I will be doing a pro-buildup of Tamiya’s hot new TC, the TA06 Pro. Not only are we going to take you step-by-step (almost) through the build, but I will also be installing some of the latest TA06 Pro hop-ups. The end result should be a pretty sick TC that will still be TCS legal.
The Build – Part 1
Ok, let’s get to it. The manual starts you off with the rear gearbox, so that will be the focus of Part 1. Even though I will be using Tamiya’s optional TA06 Ball Differential, I will show you step-by-step for the supplied gear diff.
Build Notes:
 I will be assembling this car using the IFS front suspension. For those of you unfamiliar with that, it is basically a lay-down type front end that allows the use of very low-slung bodies.
Final electronics are still up in the air, but I’m shooting for a 17.5 brushless system, LiPo pack and 2.4GHz radio. This is pretty much the norm and, again, it’s TCS legal.
The build will be from front to back in the manual and, if there are any areas I think need to be touched on I’ll do so. Pictures will be included too, but not necessarily for every step.
 Make sure you remove ALL the flashing off of the bevel gears. Tamiya does a good job of making the mold gate as small as possible but a completely flat surface is optimal.
 The parts that will go into the GEAR side of the differential. Make sure you install them in the correct order or the pin will not go through the drivecup hole.
 Fill the gear side of the differential with fluid. Tamiya includes a tube of Damper oil which, while not the best stuff to use, will work for now. Fill it to just below the top of the housing.
 Parts list for the opposite side of the gear diff. Again, make sure you install them in the correct order.
 The gasket is used to make sure your diff fluid does not leak out all over the place once it’s closed. Only ALL the screws 3/4 of the way to make sure the diff cap goes on straight. Tighten the screws in a cross pattern.
 Your completed gear diff. Happy and leak-free. Test the function by holding the gear with one hand and rotating an outdrive with the other. It should be free and not have a notchy feeling.
 The gearbox halves ready to be assembled. Nothing special here. Picture shows the optional Ball Differential instead of the gear one.
 The screws holding the gearbox halves together thread into the aluminum motor plate. Use a DAB of blue threadlocking compound on the end of the screw to make sure it stays in place.
 Install the gear and the chassis mount and you’re all set! Rear gearbox complete and ready to install!
 Part 2 – Assembling the rear gearbox to the chassis.
Back to the Tamiya TA06 Pro Build List