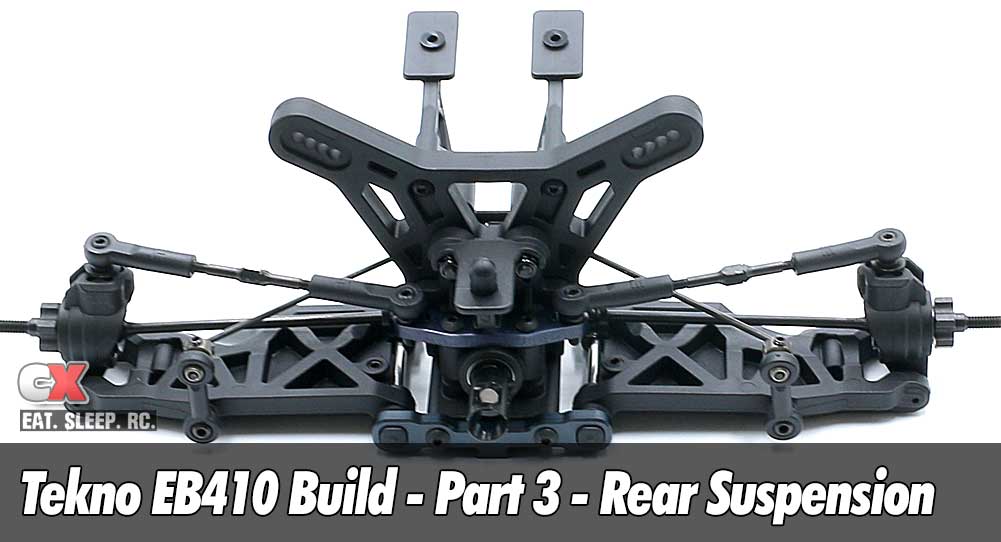
Tekno has us building the rear suspension next; hubs, suspension arms, arm mounts and rear anti-roll bar.
 There are four arm mounts used with the EB410; A mount, B mount, C mount and D mount. They are arranged as follows: A mount is also known as FF mount, or the Front of the car, Front of the bulkhead. The B mount is also known as the FR mount, or the Front of the car, Rear of the bulkhead.
The C mount is also known as the RF mount, or Rear of the car, Front of the bulkhead. The D mount, also known as the RR mount, is positioned at the Rear of the car, Rear of the bulkhead.
This will help you when assembling the car as to their exact location.
Tekno’s ballcups are directional, meaning the ballstud can only pop into them from one side. There is a ‘T’ molded into the ballcup; during assembly, make sure the ‘T’ is facing up and you’ll be good to go.
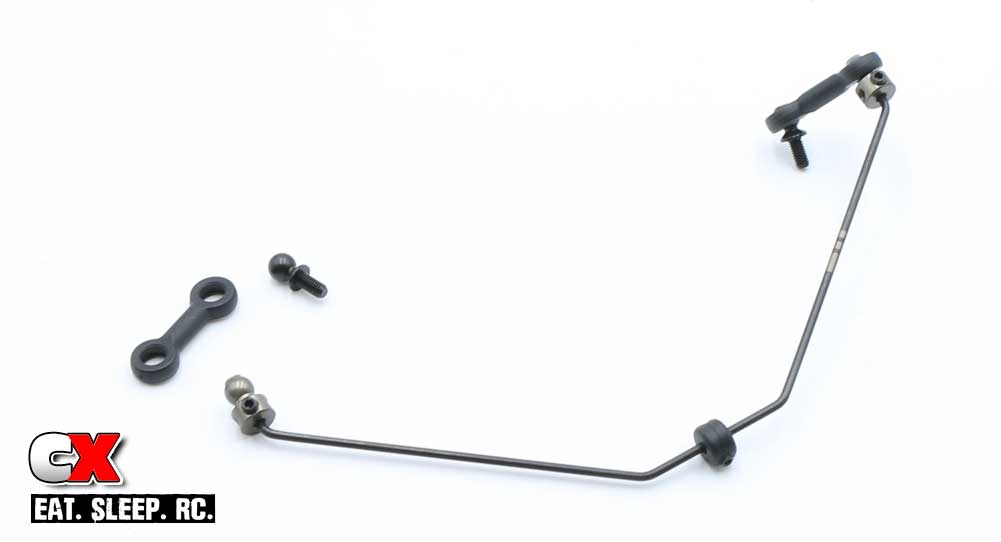
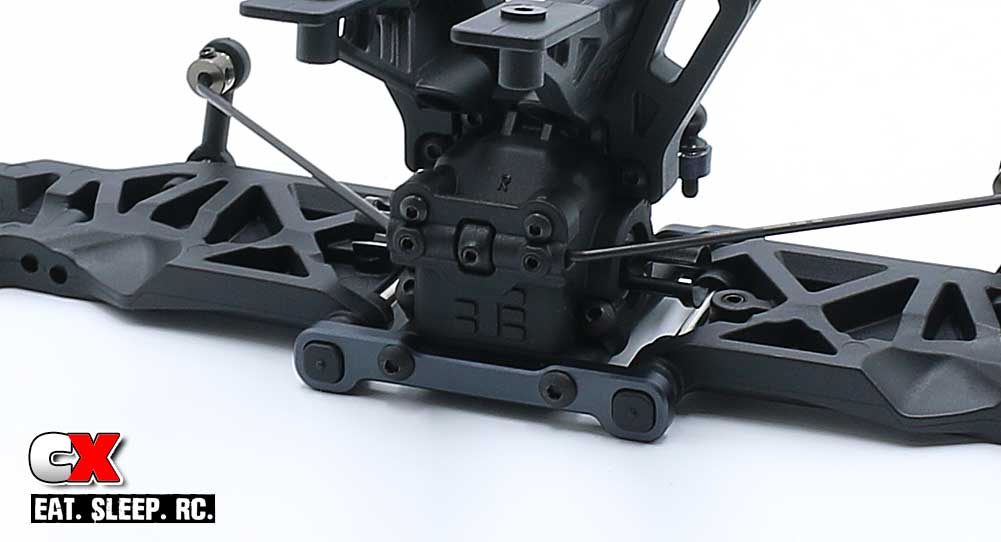
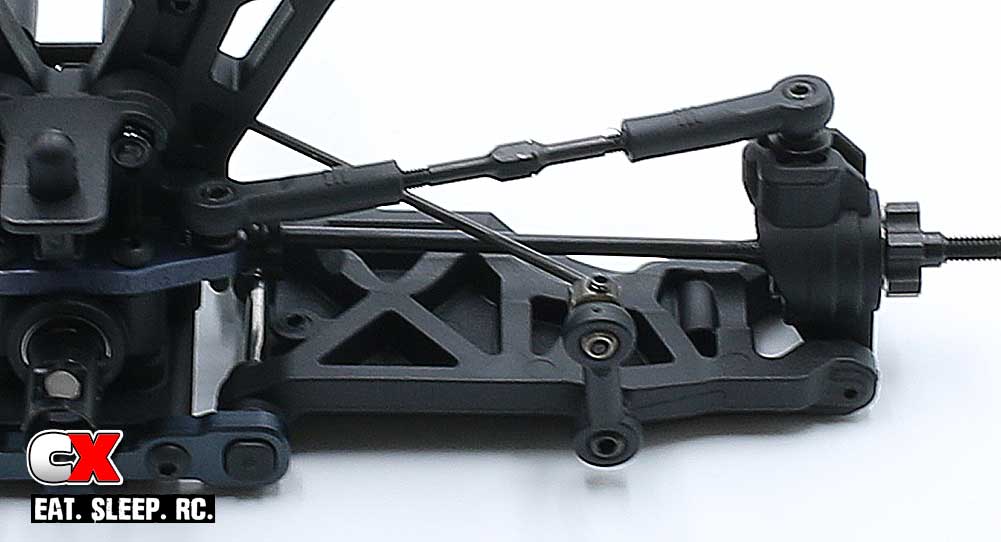
We start off this step by assembling the rear anti-roll bar. Slide the anti-roll bar pivot onto the bar, center it and lock it in place with the 4mm grub screw.
Attach the anti-roll bar ballstuds onto the each end of the bar, lining up the end of the bar with the edge of the ballstud. Lock them in place with the grub screws.
Pop one end of the plastic links onto the 6mm ballstuds and the other end onto the anti-roll bar.

Set the anti-roll bar on the back of the rear bulkhead and attach the anti-roll bar cap to keep the bar in place. Two M2.5x6mm screws secure the cap while the two M3x4mm grub screws should be inserted until they just touch the bar, them back them off a tick. These allow the bar to rotate without hinderance while removing any excess play.
You may need to adjust the pivot to center the bar in the mount.
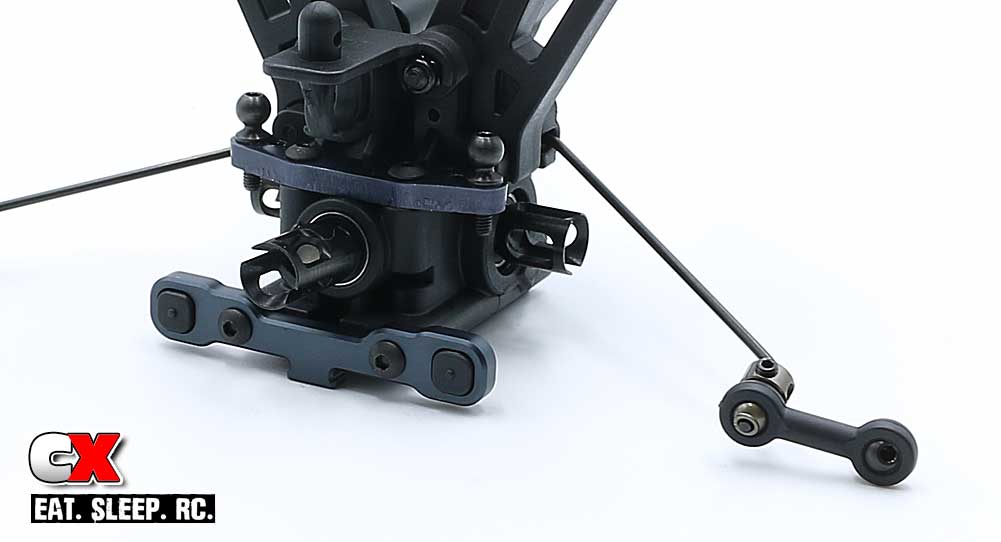
Press the center-dot inserts into the ‘C’ arm mount and attach it to the rear bulkhead assembly.
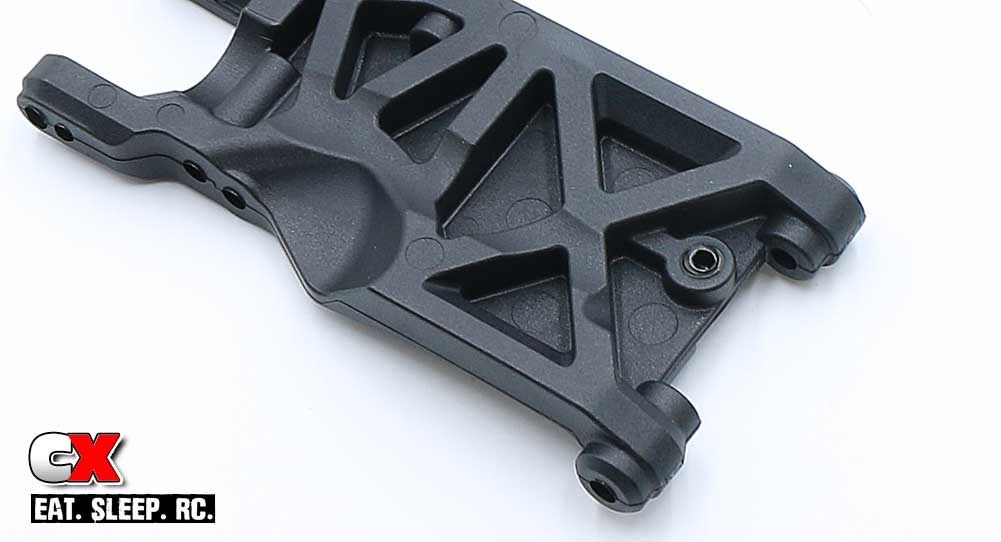
Insert the M4x8mm droop screws into both rear suspension arms. Note the orientation of the screws; they should go through the TOP of the arms.
You can adjust them at the end of the build.
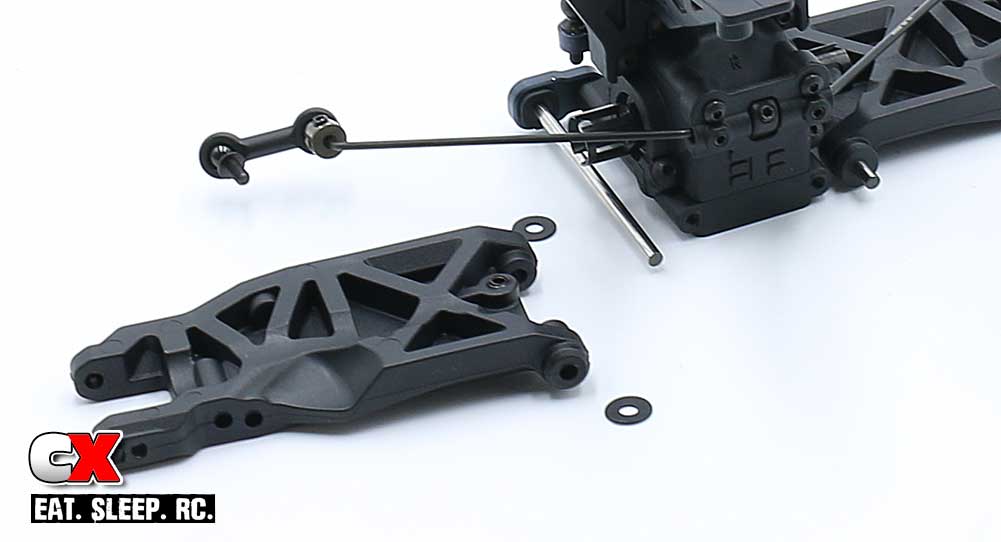
Press the rear hingepins into the ‘C’ arm mount. Slide the 1mm wheelbase shim onto the hingepin followed by the suspension arm and .5mm shim.
Press the center-dot inserts into the ‘D’ arm mount. Key the hingepins into the inserts and attach the assembly to the rear bulkhead. You can also attach the rear anti-roll bar to the suspension arms.
Move the arms up and down to make sure they swing freely. If the seem sticky, a slight tap on the side of the arm should help free it up.
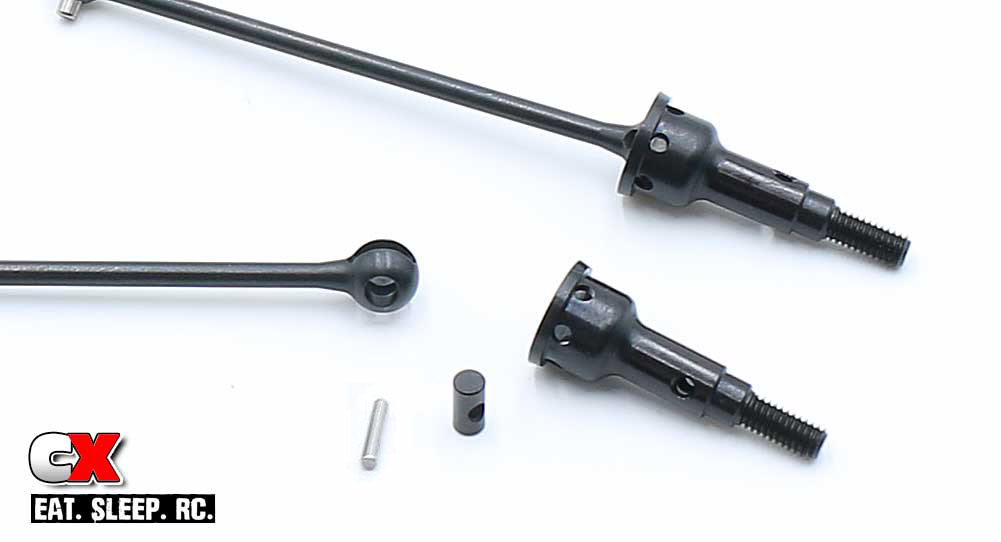
Apply a liberal amount of black grease to the ball of the CVA drives and assemble. Unlike some other drives, there are no grub screws to hold the chrome cross pin in place. This will be addressed in the next couple of steps.
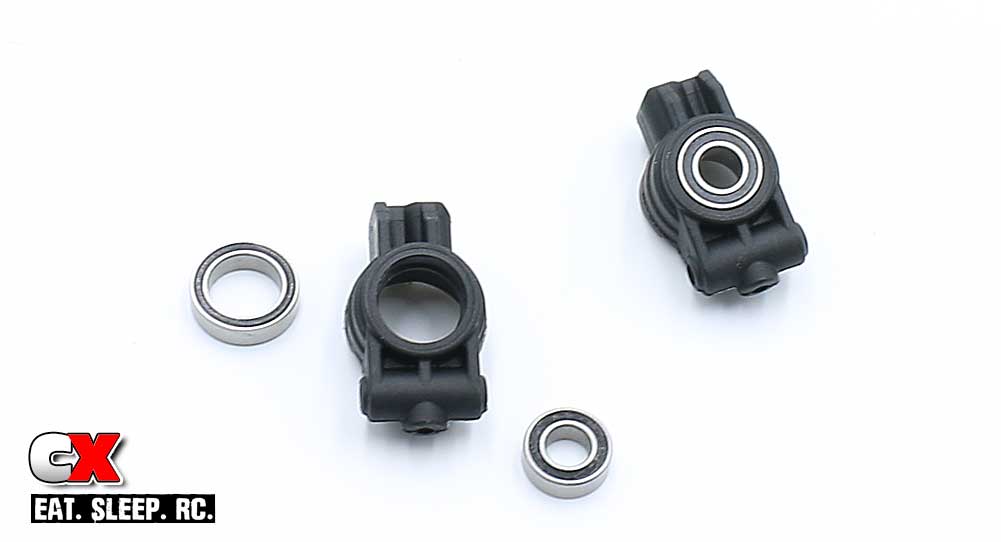
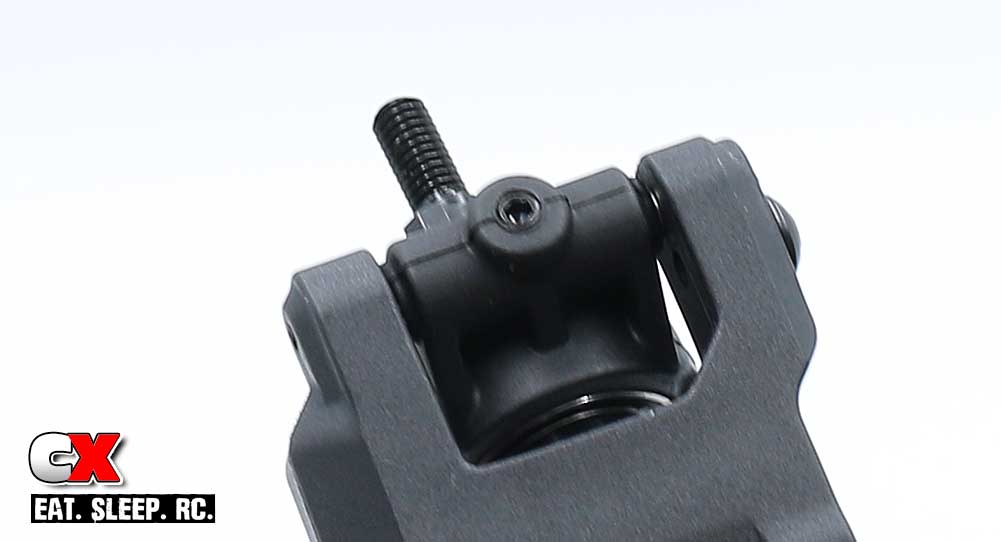
Press a 6×12 and 10×15 bearing into each side of the rear hubs.
Slide the assembled CVA through the rear hub. Slip the 6x10mm shim onto the axle followed by the chrome cross pin through the hole. Insert the grub screw into the wheel hex, slide the hex onto the axle and, after keying the hex to the cross pin, tighten down the grub screw to secure everything in place.
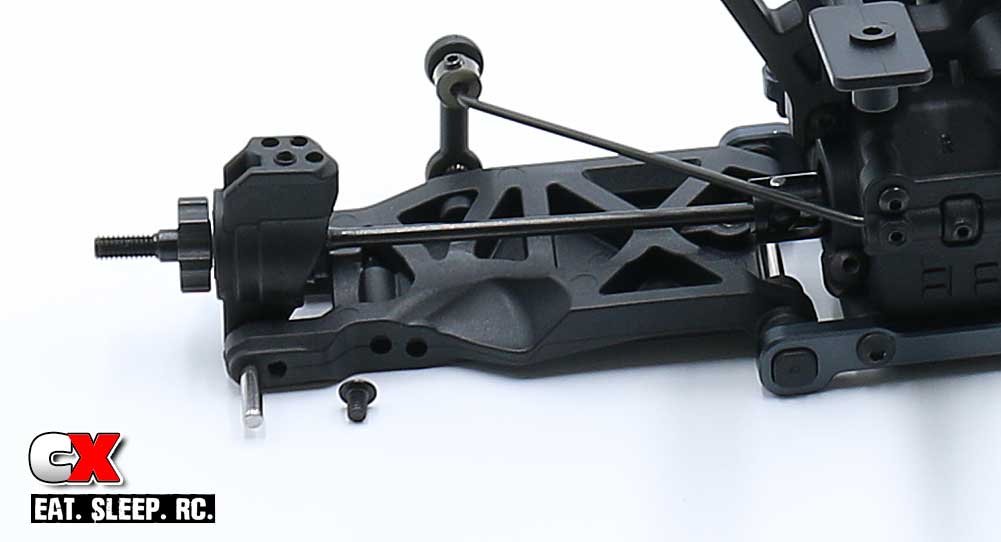
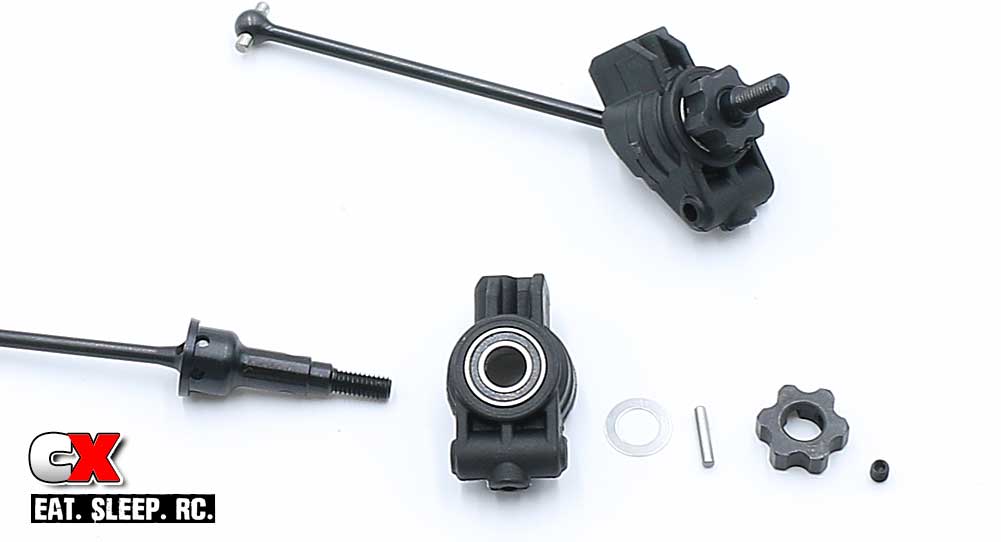
Attach the left rear hub to the left rear suspension arm with the hingepin, securing it with the M3x4mm screw.
Note the orientation of the rear hub. Make sure you are using the left hub on the left side, the right hub on the right side.
As an extra precaution, thread a grub screw through the bottom of the rear hub. DO NOT OVERTIGHTEN – just snug this little guy up.
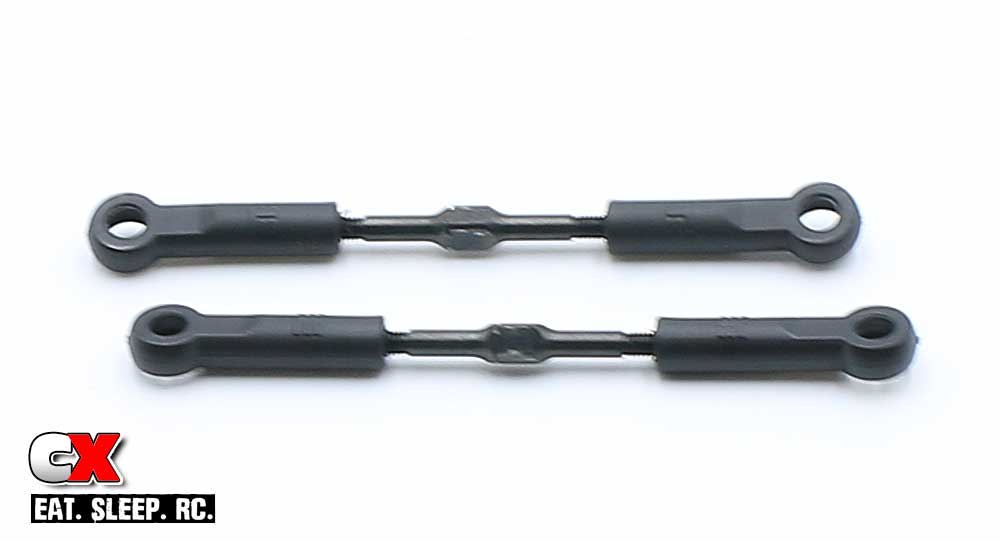
Assemble a pair of rear camber turnbuckles.
Feed the 8mm ballstuds into the rear hubs, adding two washers under each. Note the hole used in the manual (and pictures).
Pop your assembled turnbuckles into place, making sure that the notches on the links are both facing the left side of the car.
Great job. Your rear bulkhead and suspension are now built and ready to be installed onto the chassis. Get things straightened up and let’s move on to the front suspension.
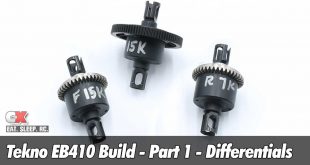
Tekno EB410 Buggy Build – Part 1 – Differentials
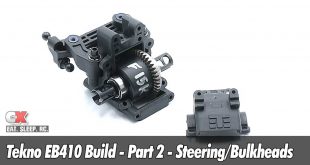
Tekno EB410 Buggy Build – Part 2 – Steering and Bulkheads
Tekno EB410 Buggy Build – Part 3 – Rear Suspension
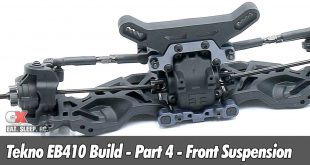
Tekno EB410 Buggy Build – Part 4 – Front Suspension
Tekno EB410 Buggy Build – Part 5 – Chassis
Tekno EB410 Buggy Build – Part 6 – Shocks
Tekno EB410 Buggy Build – Part 7 – Final Assembly