• Home
  • New To RC
    • New To RC – Overview
    • RC Auto Mall
    • RC Glossary
    • RC Building Tips
    • RC Maintenance Tips
    • RC How Tos
    • RC Anatomy Files
    • RC Driving Tips
    • The Toolbox
  • RC Reviews
    • Reviews: RC Cars
    • Reviews: RC Products
  • RC Racing
    • RC Tuning Guide
    • Blank RC Setup Sheets
    • Pro RC Drivers Setups
    • Past World Champions
  • RC Manuals
    • Battery Chargers
    • Cars and Trucks
    • Electronic Speed Controls
    • Transmitters & Receivers
  • RC Support Pages
    • RC18 Series
    • Offroad Vehicles
      • Team Associated RC8.2 Build
      • Axial EXO Terra Build
    • Onroad Vehicles
      • Tamiya F104X1 Build
      • Tamiya TA06 Pro Build
      • Team Associated TC6.1 Build
    • Monster Trucks
    • Rock Crawlers
    • Large Scale
  • RC Goodies
    • CompetitionX Videos
    • Pro RC Drivers
    • Racing Photo Galleries
    • RC Links
    • Online Track Directory
  • Racing Games
    • Forza Motorsport
    • Forza Motorsport 2
    • Forza Motorsport 3
    • Forza Motorsport 4
  • Phalen’s Garage
  • CompetitionX
    • CompetitionX Monthly Facebook Giveaway
    • About CompetitionX
    • Contact CompetitionX
    • Report a Problem
    • CompetitionX Store
    • Site Statistics
    • Advertising

Tamiya TA06 Pro Build – Part 4 – Shocks and Electronics

Home / RC Support Pages / Onroad Vehicles / Tamiya TA06 Pro Build / Tamiya TA06 Pro Build – Part 4 – Shocks and Electronics

CompetitionX Build Blog

Tamiya TA06 Pro Build – Part 4 – Shocks/Electronics

Tamiya TA06 Pro

Tamiya TA06 Pro

For the next week or so, I will be doing a pro-buildup of Tamiya’s hot new TC, the TA06 Pro. Not only are we going to take you step-by-step (almost) through the build, but I will also be installing some of the latest TA06 Pro hop-ups. The end result should be a pretty sick TC that will still be TCS legal.

Build Notes:
The TA06 Pro allows you to build the front end using either the standard shock setup or the IFS front end. Since I’ve elected to use Tamiya’s Honda HSV body, I will be building the front end in the IFS configuration.

Shock oil can be messy. Make sure you have a clean surface to work on that won’t get damaged if you spill any oil.

I will also be installing the electronics: Tekin 17.5 motor, Tekin RS ESC and Savox servo. If you have similar equipment, you will need a soldering iron handy for the ESC wires.

The Build – Part 4
For the third installment of the TA06 Pro Build we will be focusing on the front and rear suspension systems. The TA06 Pro uses the standard lower suspension arm/upper turnbuckle The fourth installment in the TA06 Pro build revolves around the shocks and electronics. Thankfully, the Tamiya shocks are some of the best in the industry, making them very easy to build and super smooth when completed. The TA06 Pro has plenty of room for the electronics, however be careful with your servo choice. I had a standard sized servo that did have a fitment issue, resulting in me having to change my servo choice (which ended up better in the long run anyway).
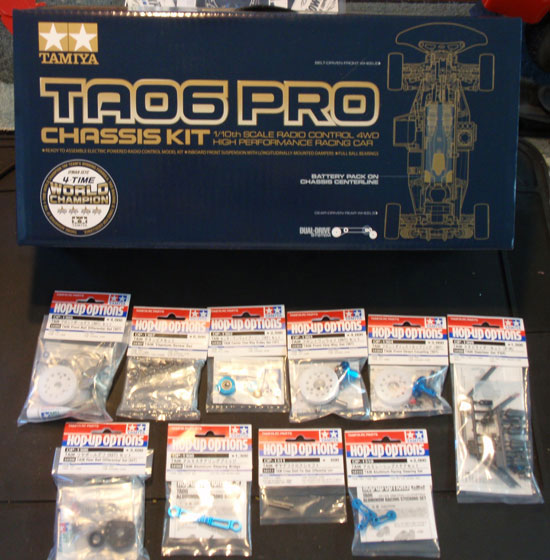
Tamiya TA06 Pro Build Step 36
The shock parts. There are alot of them! It’s a good idea to lay out all of the parts ahead to time to make sure you aren’t missing anything. Any pre-prep work can be down now also (parts claan-up, trimming the flash off the plastic parts, etc).
Tamiya TA06 Pro Build Step 37
Build the shocks per Tamiya’s instructions. Before filling with oil, make sure that both front shock are the same length (and the same with both rears). The gap between the bottom of the body and the top of the eyelet should be the same.
Tamiya TA06 Pro Build Step 38
Four completed shocks. The ones on the left are for the front. This is the final shock design for the IFS front end.
Tamiya TA06 Pro Build Step 39
Install the rear shocks per the instructions. Easy-peasy.
Tamiya TA06 Pro Build Step 40
Install the front shocks per the instructions. Another simple step. Shocks done!
Tamiya TA06 Pro Build Step 41
Follow the instructions carefully while building the belt tensioner as there are a few washers that need to be inserted between and around the belt tension bearings.
Tamiya TA06 Pro Build Step 42
Installing the motor is a simple step. You will most likely need to attach the pinion AFTER you have installed the motor. Don’t forget the motor screw washers! These are important.
Tamiya TA06 Pro Build Step 43
Set the gear mesh so that there is a TINY bit of play between the gears. Lock those motor screws down good!
Tamiya TA06 Pro Build Step 45
As I mentioned before, I had a few issues with my original motor choice. I decided to go with Savox’s SC-1251MG. It’s fast, has good torque and its extremely low-profile design fits perfect in the space provided.
Tamiya TA06 Pro Build Step 46
Tekin’s RS ESC got the call for the power-transfer duties. It’s small footprint allows me to mount it just about anywhere. Plus, I love the smoothness and power this ESC provides.
Tamiya TA06 Pro Build Step 47
Wiring may seem a bit tricky, but Tamiya does a great job of engineering some wire-routing areas on the TA06 Pro. This keeps things tidy and routes the wires away from the belt.
Tamiya TA06 Pro Build Step 48
I doesn’t mention this in the instructions, but a nice little ‘through-hole’ is molded into the battery tray. This is perfect for sending the ESC wire to the receiver.

Stay tuned for Part 5 – Assembling and installing the wheel/tires, body mounts and bumper.

Tamiya TA06 Pro Build – Part 1 – Transmission
Tamiya TA06 Pro Build – Part 2 – Gearbox/Steering
Tamiya TA06 Pro Build – Part 3 – Front/Rear Suspension
Tamiya TA06 Pro Build – Part 4 – Shocks/Electronics
Tamiya TA06 Pro Build – Part 5 – Wheels/Tires/Bumper
Tamiya TA06 Pro Build – Part 6 – Body


Search CompetitionX


Other CompetitionX Builds

Team Associated TC6.1
Axial EXO Terra
Team Associated RC8.2
Tamiya F104X1 Formula 1
Tamiya TA06 Pro

Recent Posts

  • "Kling-On" RC Storage Racks
    05-22-2012
  • P1 Brand  P1 Brand "Badged" Flexfit Hats
    05-22-2012
  • AVID RC Aluminum Servo Saver Arm for the Team Associated RC8.2 AVID RC Aluminum Servo Saver Arm for the Team Associated RC8.2
    05-22-2012

Support CompetitionX

CompetitionX
CompetitionX is the world's leading source for RC information. Since 2001, CompetitionX has been providing the RC community tons of tuning tips, tricks, how-to's and online articles on all the latest and greatest RC vehicles. We also maintain the largest new and vintage RC Manual database on the web!
Popular Pages
Home
New: RC Vehicles
RC Reviews
RC Tuning Guide
RC Manuals
Blank RC Setup Sheets
RC Glossary
Online Track Directory
RC Links
Phalen’s Garage
Sitemap
Latest Builds
Team Associated TC6.1
Axial EXO Terra
Team Associated RC8.2


Upcoming Builds
Team Associated FT SC10 4x4
Thunder Tiger KT8 Kart


Searching For
RC Manuals
Acme Condor Nitro, Acme Condor Pro Nitro, (More)
Contact Us
Contact CompetitionX
Advertising
Sitemap
Report a Problem

Infect Others
Facebook   
Twitter   
© Copyright 2001 - 2012 CompetitionX - Legal - Advertising - Sitemap
Web Site Design by CompXWeb