Beginner’s Guide to RC – Short Course Tire Mounting 101
Mounting tires is nothing new; mounting them the correct way is a whole different story. While there is, I’m sure, hundreds of different tire mounting articles out there, this subject is always safe to revisit with all the new easy-to-use technology out there to get the job done. I’ve put together a short How To regarding the mounting of 1/10th scale Short Course tires.
1. Get Your Kicks
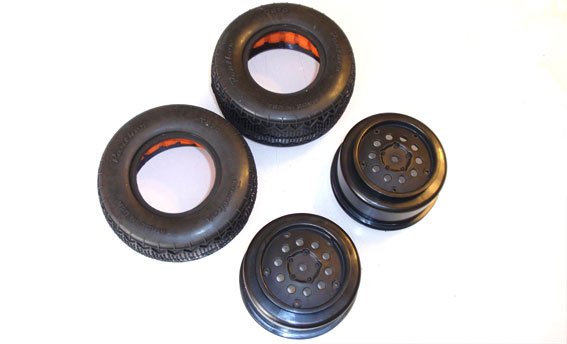
For this article I will be using a set of Panther’s Rattlers, their new Orange Closed-Cell Foam SC Inserts and a set of Losi SC wheels. Additional items include Panther’s Tire Bands, AKA glue, motor spray and some CompetitionX Gloo Toobs.
2. Prepping the Tires
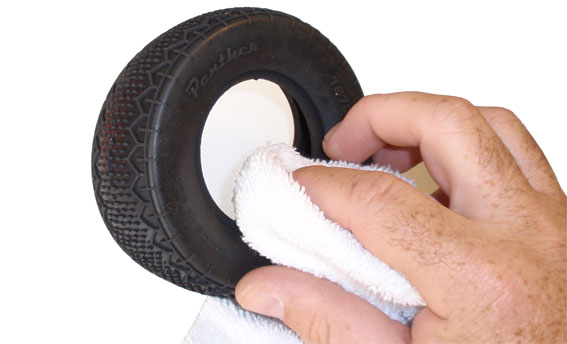
When the tires are created, they are coated with a chemical release agent that helps them separate from the mold. This chemical can sometimes interfere with the bonding of the tire and wheel. Take a clean rag, shoot some motor spray onto it and clean both the inside and outside beads of the tire. You can also repeat this procedure on the wheels.
3. Insert the Insert
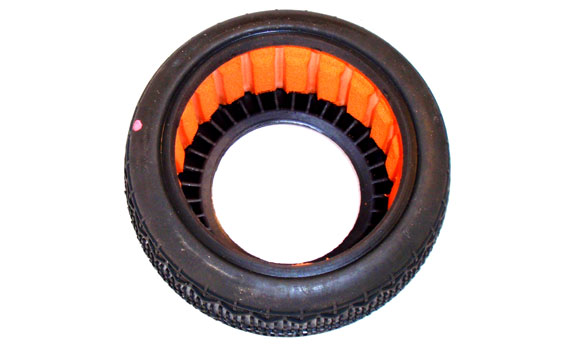
Take your insert, fold it over and squeeze it into the tire. Open it up so that it forms to the inside of the tire as shown. This process is easy with any closed cell foam insert but can be a little more tricky with a standard foam insert. Just take your time and it will fit. Trust me.
4. Mount the Tire
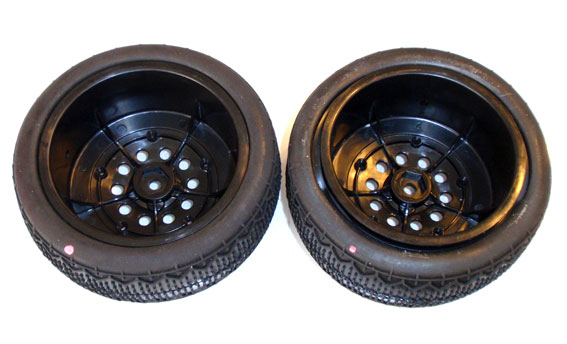
You’ll notice that your SC wheel is smaller on the face of it than on the back. Insert the wheel from the BACK of the tire, pushing it through until you can seat the rear of the tire into the rear bead of the wheel. The picture above shows two examples; the one of the left is correct, the one on the right is janky. Don’t be janky.
5. Mount the Tire Part Deux
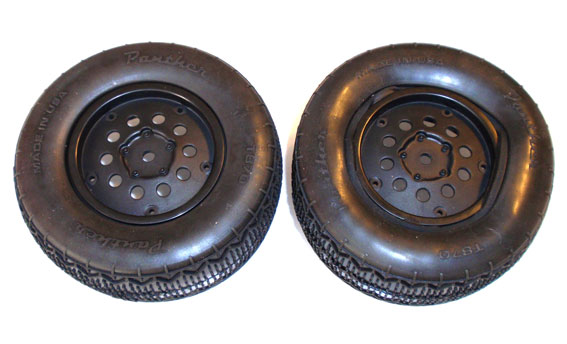
Now that you have the backside of the tire seated, flip the tire/wheel over and correctly seat the front side of the tire. Again, the left is correct, the right is janky. Note: if you are using the standard open-cell foam inserts, this part may be a bit more tedious. Show some patience and it will work itself out. No throwing your tires around the room.
6. Tire Bands
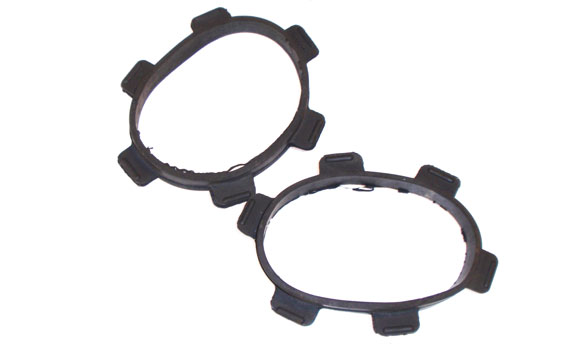
Panther’s Tire Bands are a wonderful invention. They allow you to glue tires while keeping pressure on the assembly, ensuring a nice, firm bond. Small integrated tabs allow you to easily position them wherever you need to. They’re available for 1/8th scale, 1/10th scale offroad (as seen here), and 1/10th Touring Car. You could use rubber bands, tape, Velcro or any other McGyver method, but you just won’t look as professional as you would with these. Go get some. I’ll wait.
7. Wrap ‘em Up
Stretch your Panther Tire Bands over your tire and position near the edge of the face of the tire as shown. Those little tabs come in handy now, don’t they? Since the Bands come in a pack of 4, you might as well wrap all 4 tires now.
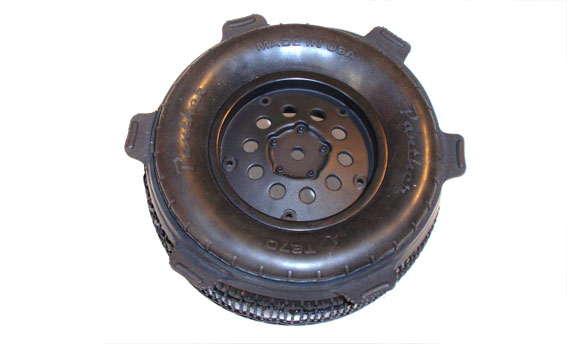
8. Gloo ‘em Up
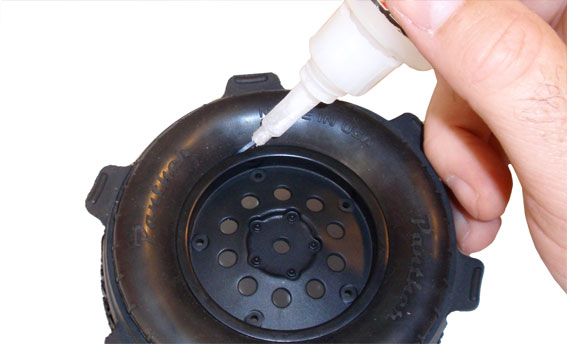
Get your glue out and insert a gluing tube into the tip of the bottle. What, don’t have any gluing tips? Oh, this is going to be messy…unless you happen to have a couple CompetitionX Gloo Toobs handy. These little gems slip into the tip of your glue bottle and make gluing an absolute joy. Use these to flow a precise stream of glue in the bead of your tire/wheel assembly. Once you’re done with the front, set it aside and let it dry. After a few minutes you can flip the tire/wheels over, re-position the Panther Tire Band and repeat the gluing process for the back side.
9. Pro-Glue Job
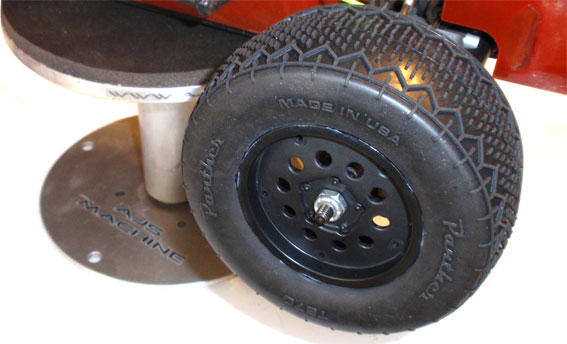
Look at that glue job. Man you’re going to make your track mates jealous. They’re all going to want you to glue their tires! Once their dry, remove the bands and mount ‘em up. They should stay super-glued to the wheels, no matter what type of insane horsepower you’re running!
Other than a different set of tire bands (a few different versions are available from Panther). you can use this procedure to mount any type of tires.
Links:
Panther, www.panther-rc.com
Losi, www.losi.com
AKA, www.raceaka.com