The Build – Part 6
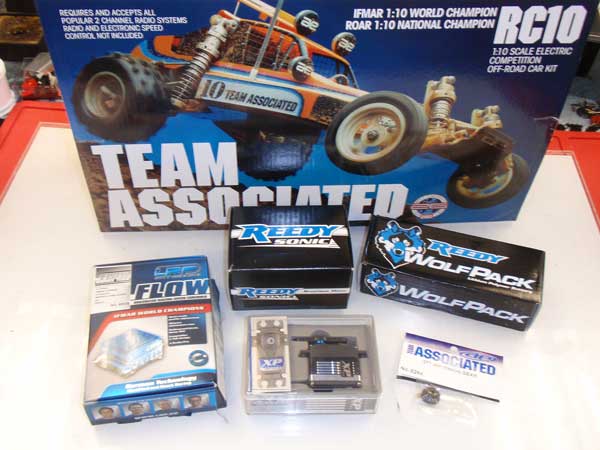
In Part 6 of our build, we’ll work on installing the electronics. Even though this is a vintage build, we won’t be installing vintage electronics. The RC10 Classic will be getting a full range race-spec XP, LRP and Reedy equipment to get ‘er up and going with the least amount of headaches.
Build Notes: Have a soldering iron handy for this step. You’ll need to attach the ESC wires to the motor and solder plugs to the battery wires.
The steering setup is like the original but can be reworked to use a turnbuckle if you wish.
Team Associated RC10 Classic Build – Step 95
Yes, this first step has nothing to do with the electronics, but it also has nothing to do with the shocks (which we built and attached in the last step). Anyway, take a sec and install the two nose tubes as shown. Make sure you install the shorter screws in the sides of the chassis and the longer ones through the front. A dab of threadlock here will help keep the screws from backing out.
Team Associated RC10 Classic Build – Step 96
Next, install the antenna mount…
Team Associated RC10 Classic Build – Step 97
…followed by the battery cup…
Team Associated RC10 Classic Build – Step 98
…following that by the battery strap. Note the orientation of the strap, and don’t forget to install the aluminum washer.
Team Associated RC10 Classic Build – Step 99
The steering linkage is next. It’s easier to assemble than it appears…just build it like the picture. I wouldn’t worry about the threadlock just yet as we’ll need to loosen those set screws again shortly.
Team Associated RC10 Classic Build – Step 100
Once built, feed one end through the servo horn as shown. You may need to open up the hole in the horn a bit to get the linkage through.
Team Associated RC10 Classic Build – Step 101
Attach the horn to the servo using the servo-supplied screw. Your assembly should look like this. For this build we are using one of Team Associated’s XP servos; the DS1313.
Team Associated RC10 Classic Build – Step 102
Attach the mounts to each side of the servo but do not tighten all the way yet.
Team Associated RC10 Classic Build – Step 103
Because mounting the servo in the car makes it difficult to tighten up the mount screws (or line up the mount holes through the chassis), we always mount the servo to the bottom of the chassis first. This allows us to line up the servo mount holes with the chassis and then tighten the screws that hold the servo to the mounts.
Team Associated RC10 Classic Build – Step 104
Remove the servo from the bottom of the chassis and install correctly. You’ll want to slide the other end of the steering linkage into the servo saver prior to mounting the servo to the chassis. Also, you might notice that my linkage is bent. This helps it clear the servo when it’s at full lock. You may have to do something similar if your linkage hits the servo.
Once mounted, turn the servo horn until it is 90 degrees straight up. If your front tires are pointing straight ahead, you’re good to go. If not, loosen the set screws on the linkage and ‘slide them apart’ to adjust. Once in position, you can put a tiny dab of threadlocker onto the setscrew and tighten them down.
Team Associated RC10 Classic Build – Step 105
Install the ESC on the right side of the chassis as shown. Since I’m running the ESC lead under the battery, I added a small piece of black tape to hold it in place. For this build we are using LRP’s awesome Flow WorksTeam Brushless ESC.
Team Associated RC10 Classic Build – Step 106
The Futaba 4PLS reciever gets mounted on the left side. Feed the antenna through the mount and tube. Plug the ESC and servo leads into the receiver.
Team Associated RC10 Classic Build – Step 107
Slide the Reedy Sonic 540 17.5T Spec Brushless Motor into place and attach with the 3x6mm screws.
Team Associated RC10 Classic Build – Step 108
Attach the pinion, set the gear mesh and tighten down the 3x6mm screws.
Team Associated RC10 Classic Build – Step 109
Attach the gear cover and dust plug.
Team Associated RC10 Classic Build – Step 110
Wire up the ESC wires to the motor and attach the sensor wire. If you feed them through the fiberglass shock tower, you might want to sand the edges slightly to avoid cutting the wires.
Team Associated RC10 Classic Build – Step 111
Install the battery and plug it in! This is a good time to give it a test to make sure everything is working.
Tony Phalen -
As an avid RC enthusiast, Tony has been building, bashing and racing RC Cars for over 30 years. He has participated in every kind of surface racing events - 1/18 scale trucks, 1/10 scale TC, Rock Racers, Rally - if it had wheels, he's raced it! He's also worked on both sides of the industry fence; collaborating with many major manufacturers (as well as being a sponsored driver) to working for a high-profile industry magazine. During this time he has learned many tricks, tips and techniques and is sharing that knowledge on CompetitionX - the most informative RC website on the internet!

 Have a soldering iron handy for this step. You’ll need to attach the ESC wires to the motor and solder plugs to the battery wires.