The Build – Part 13
In this step we will attach the shocks, front bumper and body mounts to the TC6.1.
Build Notes: Depending on the body you run, you might need to trim your front foam bumper. You can either do so with a dremel (pretty) or scissors/hobby knife (not so pretty). Either way, only take a little off at a time and test fit it.
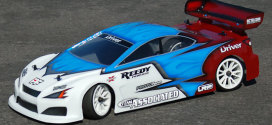
Depending on the body you run, the body pivot mounts will mount in different holes. It is suggested that you pre-mark the holes prior to painting the body. You can also completely mount the body while it’s clear (except for tire cutouts).
Team Associated TC6.1 Build - Step 105
Let’s start by grabbing your front shocks and mounting them as shown (if you built the front and rears different you did keep the them separate, right?) A dab of loctite on the upper mount will help keep those screws in place.
Team Associated TC6.1 Build - Step 106
Complete the same step for the rear. Remember that dab of loctite.
Team Associated TC6.1 Build - Step 107
If you run a transponder with mounting tabs, AE has given you the perfect spot for it. If not, I would suggest putting the screws in anyway to keep track of them (in case you decide to move your transponder up here in the future).
Team Associated TC6.1 Build - Step 108
Assemble the front body mount posts to the upper bumper brace. I push a body clip through the body post hole to help hold on to it. Try it.
Team Associated TC6.1 Build - Step 109
Slide the foam bumper onto the upper bumper brace posts and attach this assembly to the lower bumper. 3 screws is all it takes.
Team Associated TC6.1 Build - Step 110
Now take that assembly and slide it onto the front of the TC6.1. Secure with the two screws on top…
Team Associated TC6.1 Build - Step 111
…and the two screws on the bottom.
Team Associated TC6.1 Build - Step 112
This next step isn’t necessary, but I did it because there was interference between the clips and the Mazdaspeed6 body I was running. I took a pair of the body clips and slightly bent them as shown. Now they feed into the body mount posts and don’t touch the body.
Team Associated TC6.1 Build - Step 113
Insert the bent body clip though the pivoting body mount and post. If you pre-mounted your clear body, these should be set. If not, you’ll most likely need to adjust them when you mount your painted body. Make sure both sides are in the same mounting hole.
Team Associated TC6.1 Build - Step 114
Complete the above step for the rear. Bent body clips aren’t necessary here, however I do it just in case.
Tony Phalen -
As an avid RC enthusiast, Tony has been building, bashing and racing RC Cars for over 30 years. He has participated in every kind of surface racing events - 1/18 scale trucks, 1/10 scale TC, Rock Racers, Rally - if it had wheels, he's raced it! He's also worked on both sides of the industry fence; collaborating with many major manufacturers (as well as being a sponsored driver) to working for a high-profile industry magazine. During this time he has learned many tricks, tips and techniques and is sharing that knowledge on CompetitionX - the most informative RC website on the internet!


 Depending on the body you run, you might need to trim your front foam bumper. You can either do so with a dremel (pretty) or scissors/hobby knife (not so pretty). Either way, only take a little off at a time and test fit it.