The Build – Part 11
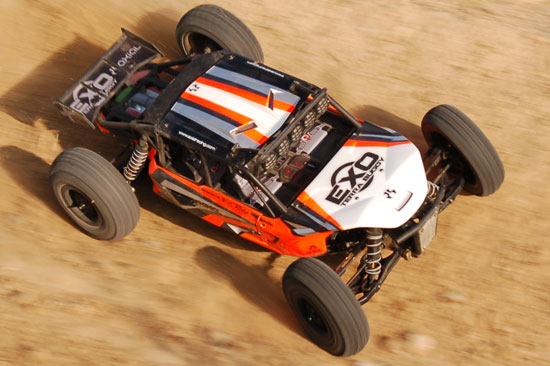
The final installment in the EXO Terra build is the body, wheels and tires. This is the step that brings the whole EXO together.
Build Notes: At this point of the build you will have hopefully painted the body panels and interior of your EXO. If not, ya better get on that now!
I installed Axial’s NVS lighting system. While this is a bit more work, I’m not going to show you the walkthru here. There are probably a couple different ways to install them. We’ll leave that for another time.
Make sure that you have your EXO chassis nice and tidy…the way you want it. Once the EXO cage is on, it’s not easy to get the chassis without completely removing the cage.
You will need to open up the body panel mounting holes. You can use a body reamer, dremel, hobby knife or whatever tool you are comfortable with. NOTE! The screws that hold the panels in place are teeny-tiny. Don’t overenlarge the holes or you’ll never get them to mount correctly!
Don’t forget to pick up your CompetitionX Gloo Toobs for that precise glue job. Yes, they’re the bees knees.
Thanks to Dave over at RC Paint Labs for the killer paint work.
Axial EXO Terra Build - Step 135
Axial has teamed up with Griffin Radiators to mold a realistic-looking, kind-of functional radiator. By kind-of I mean the blade turns. I can see a cool project here to make it actually functional. Anyway, build your radiator as shown. I painted mine silver to help make it stand out in the back of the cage area.
Axial EXO Terra Build - Step 136
Install it from the top using the two 2.6x8mm screws. Looks pretty cool painted up. You can even see the Griffin logo.
Axial EXO Terra Build - Step 137
The next step was to assemble and install the rear deck-lid light bar. If you are not using lights, go ahead and do this now. If you are using lights, you might want to wait until later when the cage is attached to wire them up correctly. Make up your mind and then sticker up and assemble the EXO interior. Mine was painted flat black from the top-side to give it a little bit more realistic look.
Axial EXO Terra Build - Step 138
Open the mounting holes, sticker up the rear deck/motor area and attach to the rear section of the EXO cage.
Axial EXO Terra Build - Step 139
Open the mounting holes in the interior section and mount to the EXO cage.
Axial EXO Terra Build - Step 140
Flip it over and *BOOM*, DIALED. If yours doesn’t look like this, you did something wrong.
Axial EXO Terra Build - Step 141
Open the mounting holes and attach the roof panel to the EXO cage.
Axial EXO Terra Build - Step 142
Open the mounting holes and attach the nose piece to the EXO cage. You can also mount the left side body panel. Don’t forget to add the cool plastic faux intake panel. Nice little extra detail.
Axial EXO Terra Build - Step 143
Rotate the EXO cage, open the mounting holes and attach the front right body panel.
Axial EXO Terra Build - Step 144
Take your right side body panel/battery panel, open the holes and attach the other plastic faux intake piece.
Axial EXO Terra Build - Step 145
Line up the body panel and attach with body clips.
Axial EXO Terra Build - Step 146
Attach the rear wing.
Axial EXO Terra Build - Step 147
Open the holes and attach the rearmost body panels. These are directional so make sure you install them on the correct side.
Axial EXO Terra Build - Step 148
Assemble the top light-bar legs…
Axial EXO Terra Build - Step 149
…and press in the plastic lenses. They should snap into place.
Axial EXO Terra Build - Step 150
Attach the LED holders. If you are not installing lights, you could skip this step.
Axial EXO Terra Build - Step 151
Install the LED holders on the rear-deck light bar.
Axial EXO Terra Build - Step 152
Attach the front lightbar as shown. You will need to remove and replace the front two roof-panel screws. You can mount the rear light-bar at this time also.
Axial EXO Terra Build - Step 153
Fit the EXO cage onto the chassis. You might need to do a little massaging to get it to line up just right. Screw it to the chassis per the instructions and attach the 3x20mm screw through the rear bumper.
Axial EXO Terra Build - Step 154
Swing the rear shocks into place and secure with the 3x15mm screws.
Axial EXO Terra Build - Step 155
Take one of your completed front shocks, line up the shock shaft eyelet with the outside hole in the front arm and screw into place. Do the same thing for the other side.
Axial EXO Terra Build - Step 156
Attach the top of the shocks to the front shock tower with the 3x25mm screw. This screw also ties into the front of the EXO cage to make a seriously rigid platform! Don’t forget the little washer behind the top of the shock.
Axial EXO Terra Build - Step 157
Insert the wheel pins into the axle, slide the wheel hexes over them (line up the slot and the pin) and secure with the setscrew. A little drop of loctite here will help keep that setscrew into place.
Axial EXO Terra Build - Step 158
Hang in there…almost done! As you can see from this picture, there are narrow and wide wheels and tires. The narrow ones go on the front, the wide ones on the rear. And yes, these are officially licensed Hankook DynaPro MT tires!
Axial EXO Terra Build - Step 159
Fit the tires over the wheels (don’t forget the inserts) and work them until all the tires sit in the ‘bead’ of the wheel. Using your CA glue (and, hopefully some CompetitionX Gloo Toobs), put a small, consistent bead of glue around the entire front/rear wheel/tire combo. The Gloo Toobs will definitely help keep mess to a minimum.
Axial EXO Terra Build - Step 160
Flip over and glue the opposite side. See any glue? RIGHT!!!! Thanks CompetitionX Gloo Toobs!!!
Axial EXO Terra Build - Step 161
Once the glue has dried (give it about 15 minutes per side), you can mount the wheels and tires to your EXO. Remember, narrow set on the front, wide set on the rear.
AND YOU ARE DONE! Time to go out and have some serious fun! Thanks for following along with CompetitionX’s Axial EXO Terra build. If you liked this, please click the ‘LIKE’ button or, better yet, tell a friend!
Check out my ‘First Look‘ at this awesome EXO buggy!
Views:1,273
About Tony Phalen
Tony Phalen -
As an avid RC enthusiast, Tony has been building, bashing and racing RC Cars for over 30 years. He has participated in every kind of surface racing events - 1/18 scale trucks, 1/10 scale TC, Rock Racers, Rally - if it had wheels, he's raced it! He's also worked on both sides of the industry fence; collaborating with many major manufacturers (as well as being a sponsored driver) to working for a high-profile industry magazine. During this time he has learned many tricks, tips and techniques and is sharing that knowledge on CompetitionX - the most informative RC website on the internet!


 At this point of the build you will have hopefully painted the body panels and interior of your EXO. If not, ya better get on that now!