The Build – Part 10
Tires make a huge difference in the handling of the F104X1. Check your local track to find out what tires they are running before you glue them on.
Build Notes: Take your time when gluing the tires into place. Nothing is worse than a tire coming off the wheel during a race. Try using my CompetitionX Gloo Toobs for a nice, strong bond.
The front aluminum screws are pretty soft. A hard hit to the front end can cause those screws to bend and cause serious handling issues. Check these out from Exotek Racing Exotek F1 4x30mm Titanium Screws
Tamiya F104X1 Build Step 66
There are quite a few manufacturers of tires for the Tamiya F1s, but I’ll be going with Pit Shimizus. These seem to work the best on most surfaces and don’t wear very much. To keep the mess to a minimum, I use my CompetitionX Gloo Toobs. Feel free to head over and purchase a package. The proceeds help support this site.
Tamiya F104X1 Build Step 67
Insert the bearings into the front wheels; one on each side.
Tamiya F104X1 Build Step 68
Slide the spacer onto the front axle followed by the front wheel. Hold everything in place with a standard locknut. Do this on both sides.
Tamiya F104X1 Build Step 69
Slide the rear wheels onto the hubs and hold in place with the flanged locknut.
Tamiya F104X1 Build Step 70
Assemble the front wing per the instructions. Remove the front-most aluminum screw that holds the front suspension to the chassis and slide the front wing into place. Replace the aluminum screw.
Tamiya F104X1 Build Step 71
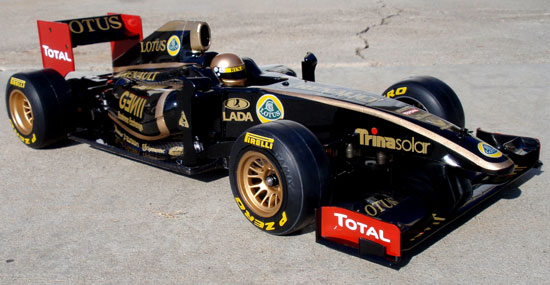
Assemble the rear wing and attach to the rear of the chassis. As an added realistic touch, I added a blinky ‘rain’ light that plugs straight into the receiver. It draws next to nothing in amperage and gives the F104X1 a killer look.
Tony Phalen -
As an avid RC enthusiast, Tony has been building, bashing and racing RC Cars for over 30 years. He has participated in every kind of surface racing events - 1/18 scale trucks, 1/10 scale TC, Rock Racers, Rally - if it had wheels, he's raced it! He's also worked on both sides of the industry fence; collaborating with many major manufacturers (as well as being a sponsored driver) to working for a high-profile industry magazine. During this time he has learned many tricks, tips and techniques and is sharing that knowledge on CompetitionX - the most informative RC website on the internet!

 Take your time when gluing the tires into place. Nothing is worse than a tire coming off the wheel during a race. Try using my CompetitionX Gloo Toobs for a nice, strong bond.