Tuesday , 23 April 2024

Team Associated B5M Build – Part 1 – Steering

Team Associated B5M Build – Part 1 – Steering

The Build – Part 1
We’re starting the Team Associated B5M build with the assembly of the steering. This buggy uses a dual bellcrank design similar to the older B4 series. I rolls on precision bearings and is extremely smooth.

Build Notes:
Pay close attention to the build steps and how the parts go together. There are molded flanges and ‘steps’ in some of the plastic parts that need to go a certain direction during assembly.

Team Associated B5M Build – Part 1 – Steering
Team Associated B5M Buggy Build Step 1
Start by assembling the steering rack. Press 4 bearings into the rack; 2 ont he top and 2 on the bottom. Slide a blue, 2mm washer over the 8mm ballstud and screw it into the rack. Flex an orange o-ring over both ballstuds.

Team Associated B5M Build – Part 2 – Steering
Team Associated B5M Buggy Build Step 2
Here’s a close up of the assembled rack. Note the arrow and the orientation of the rack.

Team Associated B5M Build – Part 3 – Steering
Team Associated B5M Buggy Build Step 3
Screw a 6mm ballstud into the left bellcrank arms and then, using the M3x12mm screws, attach the pair of bellcrank arms to the rack. Do not overtighten; you want the arms to swing freely without any binding.

Team Associated B5M Build – Part 4 – Steering
Team Associated B5M Buggy Build Step 4
Press the 4 bearings into the bellcrank arms; 2 on the bottom, 2 on the top. Slide the pair of M3x22mm screws through the bellcrank brace and up through the bellcrank arm bearings. Note the flange on the bellcrank brace; it should face upwards.

Team Associated B5M Build – Part 5 – Steering
Team Associated B5M Buggy Build Step 5
Screw the bellcrank assembly to the B5 top plate. Again, do not overtighten; the bellcrank system should swing freely.

Team Associated B5M Build – Part 6 – Steering
Team Associated B5M Buggy Build Step 6
Attach the B5M front chassis plate to the chassis.

Team Associated B5M Build – Part 7 – Steering
Team Associated B5M Buggy Build Step 7
Attach the B5M chassis cradle to the chassis.

Team Associated B5M Build – Part 8 – Steering
Team Associated B5M Buggy Build Step 8
The B5M comes with 2 from bulkheads; a 25° and a 30°. We’re going to build the kit with the 25° block. To make it easier to read, I took a silver Sharpie and colored the etched area. This is optional but makes it much easier to read it.

Team Associated B5M Build – Part 9 – Steering
Team Associated B5M Buggy Build Step 9
Press the 25° bulkhead onto the steering rack assembly.

Team Associated B5M Build – Part 10 – Steering
Team Associated B5M Buggy Build Step 10
Attach the assembly from Step 9 to the chassis, securing with the M3x16mm screws. You’ll be inserting the screws into the rear-most holes under the chassis.

Team Associated B5M Build – Part 11 – Steering
Team Associated B5M Buggy Build Step 11
Your assembly steering. Rotate the rack to make sure if swings freely back and forth. If not, disassemble and loosen the screws slightly from Step 5.

Team Associated B5M Buggy Build – Part 1 – Steering
Team Associated B5M Buggy Build – Part 2 – Front Suspension
Team Associated B5M Buggy Build – Part 3 – Rear Suspension
Team Associated B5M Buggy Build – Part 4 – Transmission
Team Associated B5M Buggy Build – Part 5 – Axles & Turnbuckles
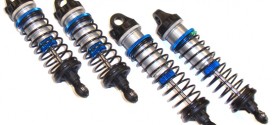
Team Associated B5M Buggy Build – Part 6 – Shocks
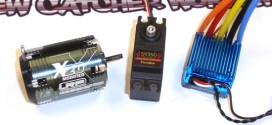
Team Associated B5M Buggy Build – Part 7 – Electronics
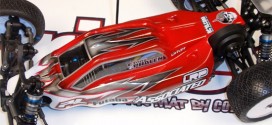
Team Associated B5M Buggy Build – Part 8 – Body, Wheels & Tires

Back to the Team Associated B5M Buggy Build List

About Tony Phalen

Tony Phalen - As an avid RC enthusiast, Tony has been building, bashing and racing RC Cars for over 30 years. He has participated in every kind of surface racing events - 1/18 scale trucks, 1/10 scale TC, Rock Racers, Rally - if it had wheels, he's raced it! He's also worked on both sides of the industry fence; collaborating with many major manufacturers (as well as being a sponsored driver) to working for a high-profile industry magazine. During this time he has learned many tricks, tips and techniques and is sharing that knowledge on CompetitionX - the most informative RC website on the internet!

Check Also

Video: FULL SEND - Tamiyas XM-01 M-Chassis Rally Car

Video: FULL SEND – Tamiya’s XM-01 M-Chassis Rally Car

The new Tamiya XM-01 is a whole lot of fun, so much so that we …