Element RC has included a stellar set of aluminum shocks with the Enduro Builder’s Kit. Seems like a very Factory Team option; aluminum bodies with blue aluminum caps, collars, bottom caps and spring retainers. Silky smooth goodness.
 Seeing the amount of work the Element RC team put into this truck, I’m going to start with the kit supplied 30wt oil. Probably good for most situations.
You’ll want to have some sort of shock stand and paper towels handy. Shock oils can get messy so make sure your work surface is also covered.

Before we assemble, I just want to give a shout out to all the aluminum included in the Enduro Builder’s Kit. I know some high-end race kits that don’t include shocks this pretty.

I also like to separate the o-rings prior to building as well. The larger, black o-rings are for the shock collars, the smaller, black ones for the upper shock body and the right ones (red ones) surround the shock shaft.

As with all my builds, I like to install the shock and collar o-rings up front. Trying to do this with any shock fluids on your hands can result in a large amount of 4-letter works exiting your mouth.

Ok, on to the build. Install a piston onto each shock shaft. All the pistons and shafts are the same – just build.

I like to build the lower shock cartridge area a little different than most. Slide the shaft into the shock body, then slip on the lower parts (o-ring, spacer, o-ring). Add a light dab of oil to the o-rings and shaft and slide these parts up into the lower shock area.
Building the shocks this way helps prevent the threads on the shaft from potentially tearing the o-rings during installation.

Screw on the lower shock cap, then install the short straight rod ends to each shock shaft.

Fill the shocks with oil. Plunge the shaft up and down a few times (slowly) to release any air bubbles from under the piston. Set aside in your shock stand until the bubbles have disappeared.

I like to add a little more oil to the shock – just enough until the oil is flat across the top. Add 2 drops inside the cap, flip the cap over and screw onto the top of the shock. I only screw it on about 4 turns.
Set the shock down on a piece of paper towel and slowly compress; once the shock is fully compressed, screw the cap all the way on. You may see a little bit of oil release as you’re doing so. This is fine. Just make sure you follow the exact process for the other three shocks.

Once bled, install the shock collar, spring and retainer. Boom – shocks done! Beauties, right?

Here we are again, back at the short and tall pivot balls. For the next steps, we’ll be using the tall pivot balls on the upper shock mounts, the short pivot balls on the lower.

Attach the front shocks. Do not overtighten.

Attach the rear shocks. Do not overtighten.
You can adjust ride height by moving the shock collars up or down. There are also multiple holes in the upper mounts for adjusting shock ‘tension’.
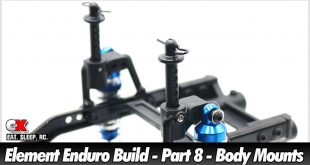
Good job – clean up any mess you might have and let’s get to the final step – Part 8 – Body Mounts.
Element RC Enduro Trail Truck Build – Opening Page
Element RC Enduro Trail Truck Build – Part 1 – Pre-Build
Element RC Enduro Trail Truck Build – Part 2 – Chassis
Element RC Enduro Trail Truck Build – Part 3 – Transmission
Element RC Enduro Trail Truck Build – Part 4 – Axles
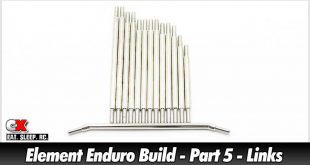
Element RC Enduro Trail Truck Build – Part 5 – Links
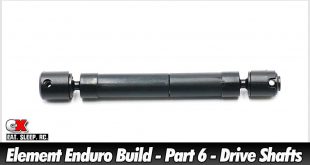
Element RC Enduro Trail Truck Build – Part 6 – Drive Shafts
Element RC Enduro Trail Truck Build – Part 7 – Shocks
Element RC Enduro Trail Truck Build – Part 8 – Body Mounts