The Build – Part 1
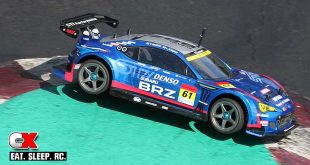
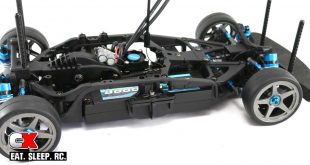
Tamiya has us starting the build of the TA07 Pro with the rear suspension. It pulls parts from the TRF419, so you know right off the bat you’re getting a car that can be tuned for maximum performance.
 In Step 4 you will be assembling the lower belt pulley. There are two similar spacers that are available to slide between the bearings; make sure you are using the 3x5x.03mm one – it’s the skinnier of the two.
The first thing we need to do is assemble the rear suspension arms. Start by screwing in the droop screws as shown, making sure that they are sticking about 1mm out of the bottom of the arm. Next, attach the blue ball ends into the arms. Finally, slide the hinge pin through the arm, adding a washer and suspension ball to each end. I suggest using a small amount of black grease to keep the hinge pin parts intact while assembling.

Attach the rear C arm mounts to the chassis. We’ll be using the ‘A’ block here, so make sure the ‘A’ label is to the outside. I’ve highlighted it for reference. At this time, you’ll also want to cut off the plastic chassis overflow piece. I suggest cutting it off at a slight angle as shown. This will help out later in the build.

Slide the arms in place (note the orientation) and slip the rear 1D arm mount onto the chassis, securing it from underneath with the two 3x8mm screws. Make sure the arms move up and down freely.

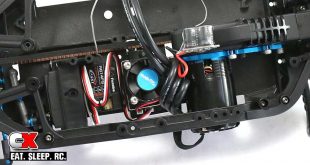
Assemble the lower belt pulley. Make sure you don’t over-tighten the compression screw. Attach the assembly to the chassis as shown.

Attach the bulkheads to the chassis. Note the orientation. Do not tighten them down all the way just yet; we’ll do that at a later step.
Part 1 of the rear suspension complete. Time to move on to the front suspension.
Tamiya TA07 Pro Build – Part 1 – Rear Suspension
Tamiya TA07 Pro Build – Part 2 – Front Suspension
Tamiya TA07 Pro Build – Part 3 – Motor Mount
Tamiya TA07 Pro Build – Part 4 – Differentials
Tamiya TA07 Pro Build – Part 5 – Motor Mount / Drive Belt
Tamiya TA07 Pro Build – Part 6 – Steering
Tamiya TA07 Pro Build – Part 7 – Knuckles / Rear Hubs
Tamiya TA07 Pro Build – Part 8 – Shocks
Tamiya TA07 Pro Build – Part 9 – Electronics
Tamiya TA07 Pro Build – Part 10 – Wheels / Body Mounts / Battery Tray