The Build – Part 4
Tamiya has included a pair of fluid-filled gear differentials with the TA07 Pro. They work great and include high-quality internal pieces and a gasket to prevent leaking.
 We’ll be using diff fluids in this step, so I suggest a nice, clean surface with some old rags in case things get messy. You are required to build two diffs, but if you’re going to install a front spool from the get-go (suggested), you only need to build one.
Tamiya has designed the diff halves to assemble one way and one way only. To help key them together when they’re full of gears and fluid, use a silver Sharpie to apply a small mark where the dimples are. Trust me, this will help out alot at the end of this assembly step.

Assemble the large side of the diff half; outdrive, metal bushing, diff housing, red o-ring, washer and cross pin.

Here is what the finished assembly should look like.

Gather the plastic diff parts and remove any flashing on them.

Place one of the larger satellite gears into the diff half, keying it to the cross pin. Slide four of the smaller satellite gears onto the 4-prong and set the assembly into the diff housing. Press the 4-prong satellite assembly down while spinning the outdrive to seat all the gears.

Pour quality diff fluid into the diff housing, just a little at a time. You want to make sure the fluid gets into all the nooks and crannies. Fill to the top of the smaller satellite gears.

Assemble the other side of the diff unit; outdrive, metal bushing, diff housing, red o-ring, washer and cross pin.

Here is what the finished assembly should look like. At this time you can also attach the gasket.

Assemble the two diff halves together, lining them up with the silver marks you applied in Step 1. The marks make it extremely easy to see instead of fumbling around. Secure with the four 2x8mm screws.

Slide one of the 10x13x.2mm shims and large bearing on each side of the diff half.
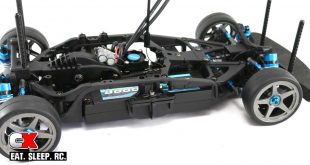
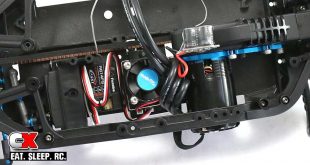
Did you make a mess with the diffs? No? Great! Let’s attach the motor mount and add the drive belt.
Tamiya TA07 Pro Build – Part 1 – Rear Suspension
Tamiya TA07 Pro Build – Part 2 – Front Suspension
Tamiya TA07 Pro Build – Part 3 – Motor Mount
Tamiya TA07 Pro Build – Part 4 – Differentials
Tamiya TA07 Pro Build – Part 5 – Motor Mount / Drive Belt
Tamiya TA07 Pro Build – Part 6 – Steering
Tamiya TA07 Pro Build – Part 7 – Knuckles / Rear Hubs
Tamiya TA07 Pro Build – Part 8 – Shocks
Tamiya TA07 Pro Build – Part 9 – Electronics
Tamiya TA07 Pro Build – Part 10 – Wheels / Body Mounts / Battery Tray