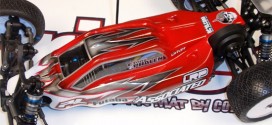
Team Associated B5M Build – Part 2 – Front Suspension
The Build – Part 2
The front suspension on the B5M has been completely revamped from the B4. If you’re an avid AE owner, you’ll want to take a few extra seconds while building to make sure you have everything pointing in the right direction.
Build Notes: A few of the parts have additional markings on them (ie, degrees, arrows, etc). To make these a little easier to read, I hightlighted them using a silver Sharpie.
Team Associated B5M Buggy Build Step 12
Grab the axle inserts from the bag and match up the sets; there will be four 3mm inserts and four 2mm/4mm inserts. Again, to make them more visible, I highlighted them with a silver Sharpie.
Team Associated B5M Buggy Build Step 13
Insert the 6mm ballstud into each steering block (they only install one way). Use the M3 locknut to capture the ballstud.
Team Associated B5M Buggy Build Step 14
Press the steering block inserts into place; I’m installed them using the kit standard 4mm setting. Once installed (and completely seated), press a 5×10 bearing into one side. Now install the crush tube followed by another 5×10 bearing.
Team Associated B5M Buggy Build Step 15
Slide the front axle into place and secure with the M3x5mm screw. A small drop of threadlocker is suggested here.
Team Associated B5M Buggy Build Step 16
Before we move on, get aquainted with the caster blocks. It’s possible to get these mixed up so pay attention to the next few steps to make sure you’re using the correct one. The one on the left is the left block; the one on the right is the right block.
Team Associated B5M Buggy Build Step 17
Install the 10mm ballstud, capturing it with the M3 locknut. Slide a 5° caster block insert into the opening as shown. The manual also has you installing a M2.5x6mm screw and a M3x8mm set screw. These are optional parts; since AE didn’t include them, I’m not going to worry about them until I feel I need them.
Team Associated B5M Buggy Build Step 18
Insert the hat bushings up and into the holes in the caster block. Slide the steering block assembly into place and secure with the M3x12mm screws. Do not overtighten; you want them tight enough that there is very little play but still having free swing movement.
Team Associated B5M Buggy Build Step 21
A quick look at the two front suspension hinge pins; the ones on the left are for the caster block, the ones on the right for the inner bulkhead.
Team Associated B5M Buggy Build Step 19
Slide the hinge pin though the suspension arm, the spacer and then the caster block assembly. Secure with the M2.5 screw. Note the orientation of the suspension arm.
Team Associated B5M Buggy Build Step 20
Assembled left front suspension arm.
Team Associated B5M Buggy Build Step 22
Now mate your front suspension arm assemblies to the front bulkhead (already attached to the chassis) and slide the longer hinge pins through to secure. Press the front hinge pin brace into place and secure with the two M2.5x8mm screws.
Team Associated B5M Buggy Build Step 23
Flip the B5M over and attach the front bumper.
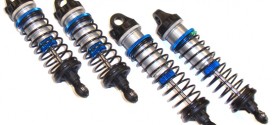
Team Associated B5M Buggy Build Step 24
Assemble the front shock tower as shown. Do not overtighten the 10mm ballstuds.
Team Associated B5M Buggy Build Step 25
Attach the front shock tower to the front bulkhead with the four M3x12mm screws.
Once completed, make sure the front suspension swing freely.
Tony Phalen -
As an avid RC enthusiast, Tony has been building, bashing and racing RC Cars for over 30 years. He has participated in every kind of surface racing events - 1/18 scale trucks, 1/10 scale TC, Rock Racers, Rally - if it had wheels, he's raced it! He's also worked on both sides of the industry fence; collaborating with many major manufacturers (as well as being a sponsored driver) to working for a high-profile industry magazine. During this time he has learned many tricks, tips and techniques and is sharing that knowledge on CompetitionX - the most informative RC website on the internet!

 A few of the parts have additional markings on them (ie, degrees, arrows, etc). To make these a little easier to read, I hightlighted them using a silver Sharpie.