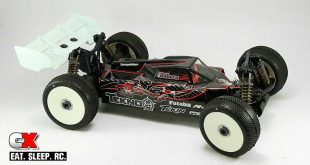
The Build – Part 1
The first part of our Tekno RC EB48.4 build has us working on the differentials. Both the front and rear are identical, being large fluid-filled units with hardened gears and outdrives. The center diff is similar, the only difference being the main gear.
 We will be working with diff fluids in this step, so make sure you have a clean work area and some towels handy to clean up any mess you might make.
The first thing we need to note is the groove in the outdrives (noted by the arrow). We’ll be applying a liberal amount of black grease here to help keep everything lubed and to reduce wear. Also take note of the hole in the outdrive and its relation to the slot in the cup. You’ll need to reference this in Step 3 and Step 13.

Let’s build the center diff first. Locate one of the three diff cases and press a 8x16mm bearing onto the nub, then drop the lubed outdrive into the hole.

Flip the diff half over, apply a liberal mount of black grease inside the diff housing (around the outdrive shaft) and slide a red o-ring into place followed by a 6x17mm diff shim. Using your newfound knowledge from Step 1, line up the cross pin and slide it through the hole in the outdrive. Key the sun gear to the cross pin and press into place. If you’ve done it right, the outdrive shaft will be flush with the top of the sun gear.

Before we build the small sun gear assemblies, note the flat spots on the notched pins. The arrow points to the flat that is used to key these pins to the differential case.

Slide a small sun gear onto the end of each notched pin. Make sure the gear teeth are facing in.

Drop one of the small sun gear assemblies into the diff case. Remember to key the the flat spots on the pins to the case. The first sun gear assembly should have the notch facing up; the second should have the notch facing down.

Using the supplied 10K diff oil, fill the diff case all the way up to the top of the sun gears. You may need to rotate the outdrive a couple times to make sure the oil flows into all the nooks and crannies.

Grab the center diff gear and press on a 8x16mm bearing followed by the outdrive. Don’t forget to lube the outdrive up with black grease.

Flip the assembly over, grease up the outdrive shaft and slide the o-ring and 6x17mm diff shim into place. Insert the cross pin (like we did in Step 3) followed by the larger sun gear. Again, if the sun gear is correctly installed, it will be flush with the outdrive shaft.

To wrap up the assembly of the center diff, place the blue gasket in place, mate the two diff halves together and secure with the four M3x14mm screws.
Racer Tip: the blue gasket can move around a bit during installation. Apply a small dab of black grease to the gear before setting it in place. This will help keep it in place when mating the two diff halves together.

This step is completely optional, but I like writing what fluid is in the diff for easy identification.

Overall assembly of the front and rear diffs is similar to the center diff, so you can build the two remaining diffs at the same time.
Start by lubing the outdrive, pressing on the 8x16mm bearings and dropping the outdrive into place.

Lube the outdrive (on the inside), install the red o-rings, 6x17mm shims, cross pins and larger sun gears.

Build your two (or in this case, four) smaller sun gear assemblies and install.

Fill one diff with 10K fluid (this will be your front diff) and one with 7K fluid (this will be the rear diff – DON’T MIX THEM UP). Set the blue gasket in place, mate the two diff halves together and secure with the four M3x14mm screws.

Scribble the weight and location of the diffs on the housings as shown.
Part 1 of our build is done! Set your diffs aside, clean up any mess you might have made and let’s move on to the bulkheads and suspension.
Tekno RC EB48.4 Build – Part 1 – Differentials
Tekno RC EB48.4 Build – Part 2 – Bulkheads / Suspension
Tekno RC EB48.4 Build – Part 3 – Steering
Tekno RC EB48.4 Build – Part 4 – Center Bulkhead
Tekno RC EB48.4 Build – Part 5 – Shocks
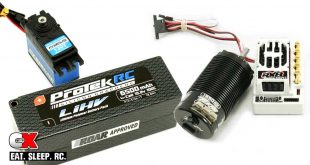
Tekno RC EB48.4 Build – Part 6 – Electronics
Tekno RC EB48.4 Build – Part 7 – Body, Wheels and Tires