The Build – Part 6
Since the Tekno RC EB48.4 is a competition-level buggy, I get to put competition-level electronics in it! For this step we’ll be installing some gear from Futaba, ProTek RC, Tekin!
 The steering servo resides at the front of the buggy, the receiver towards the back. This is great for weight distribution but, unfortunately, the servo lead isn’t long enough to reach the receiver. FYI, you’ll need an extension to make it work; it’s say a 2-3″ one is good; all I had lying around was a 8″ one. I guess it will work for now.
Have some CA glue handy. In Step 3, you’ll need to CA some rubber o-rings to the ESC mounting plate.
Our Tekin ESC comes without wires attached, so a soldering iron is needed. Just a heads up that you might need one if you choose a system similar to the Tekin.

The electronics install starts off with us bolting our ProTek steering servo to an aluminum bracket. This is a little tricky (I could have used a third hand) but be patient and you’ll get it. Just pay attention to the orientation of the output shaft on the servo – I didn’t and had to do this step twice.

Now install the servo assembly to the plastic side guard. I have to say, this is the most securely fastened servo I’ve ever seen!

Tekno has added some o-rings that must be CA’ed to the bottom of the ESC mount. This cushions the ride and prevents extreme jarring of the ESC during hard landings or crashes.
Make sure you wait for the CA to dry before moving on.

Attach the ESC plate to the chassis. I did this prior to attaching the ESC to it, making it easier to manage.
Once mounted, you can tape the ESC to the plate. Run the servo and ESC wires along the side of the guard to the receiver box. Two looms are attached to keep the wires tidy.
The only issue I had with this was the fact that my servo lead was too short and I needed an extension. Thankfully I had one handy (even if it was a bit long), so I was able to continue with the build.

Using double-sided tape, mount the receiver inside the box, plug the leads in and feed the antenna out the side of the box and into the antenna tube. Secure the antenna tube with a M3 grub screw. Attach the lid with the M3x6 screws.
If you’re installing a transponder, you can do so to the top of the lid. I wasn’t, but I installed the screws anyway to keep them safe.

Attach the motor mount to the motor. I suggest test fitting the motor to make sure the motor wire tabs are correctly orientated.

Time to install the battery straps. You can just set them up and adjust later, but a more effective way is to insert the battery and set the straps up right now. I’m impressed with this setup – there’s some major strappage here!

Remove the battery and attach the side rail to the chassis; six screws from the top (M4x6mm) and two from the bottom (M4x10mm). The six from the top require blue threadlocker, the two from the bottom won’t.
Note; screwing all of this together pinches the battery straps, rendering them unmoveable. If you pre-mounted the battery, you should be good to go. If not, you’ll need to loosen them up, install the battery, adjust and then re-tighten all the screws. Trust me, go back to Step 7 and do it that way. Less headaches.

Attach the right side rail to the chassis using three M4x10 and five M3x8 screws – all from the bottom.

Slide the motor into the grooves in the mount and secure with the two M4x15 screws (one from the top, one from the bottom). The M4 countersunk washers allow more gripping surface for a stronger hold. Blue threadlocker is suggested as well.
Yes, I know, I don’t have a pinion on the motor yet. Well, that’s because I wasn’t quite sure what my gearing would be for my local track. I’ll be adding it later.

Assemble the steering link. The 1mm gap is a good starting point.

Attach the correct steering horn on your servo and use the link to connect the horn to the bellcranks.
If you’re like me, you probably can’t wait to fire this thing up and here it hum. If you do, this is also a good time to check to make sure you servo arm is correctly set (see the manual about correct servo arm positioning).
Ok, do a quick clean up and let’s head into the final step – body, wheels and tires!
Tekno RC EB48.4 Build – Part 1 – Differentials
Tekno RC EB48.4 Build – Part 2 – Bulkheads / Suspension
Tekno RC EB48.4 Build – Part 3 – Steering
Tekno RC EB48.4 Build – Part 4 – Center Bulkhead
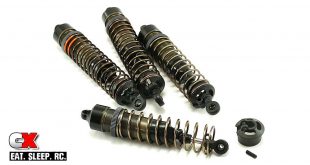
Tekno RC EB48.4 Build – Part 5 – Shocks
Tekno RC EB48.4 Build – Part 6 – Electronics
Tekno RC EB48.4 Build – Part 7 – Body, Wheels and Tires