The Build – Part 2
Part 2 of the Team Associated TC7 build revolves around the differentials. The front end uses a locked diff, or spool, while the rear uses a fluid-filled gear diff. This is pretty much the standard in touring car racing now, so let’s quit talking and get right to it!
Build Notes:
 Pay special attention to the cam settings when you build both diffs. They need to match up on the left and right.
Pay special attention to the cam settings when you build both diffs. They need to match up on the left and right.
Step 1:

Per the manual, I’m going to work on the front spool first. Start off by gluing the outer ring to the front pulley, then attach the spool hub. I would suggest a small dab of blue threadlocker to make sure those screws stay in place.
Per the manual, I’m going to work on the front spool first. Start off by gluing the outer ring to the front pulley, then attach the spool hub. I would suggest a small dab of blue threadlocker to make sure those screws stay in place.
Step 2:

I’ve lined the 8 cam holders out so you can see them a little better. The 4 on the left are for the Mid-Low and Mid-High settings; the 4 on the right are for the Low and High settings. I’ll be using the 4 Mid-Low ones.
I’ve lined the 8 cam holders out so you can see them a little better. The 4 on the left are for the Mid-Low and Mid-High settings; the 4 on the right are for the Low and High settings. I’ll be using the 4 Mid-Low ones.
Step 3:

The manual suggests the cam position at location 8, so I’ve counted out 8 spots and pressed the two pieces together. To keep things straight, I put a small silver Sharpie mark at my starting point as well as location 8. This helps me orientate the sides when it’s time to install.
The manual suggests the cam position at location 8, so I’ve counted out 8 spots and pressed the two pieces together. To keep things straight, I put a small silver Sharpie mark at my starting point as well as location 8. This helps me orientate the sides when it’s time to install.
Step 4:

The next step is to install the shim, bearing, cam/bearing holder assembly and plastic outdrive. Slide them onto the spool assembly and capture with the M2.5x10mm screw. Don’t forget your small dab of threadlocker. An added tip is to orientate both outdrives the same prior to installation. This helps when it comes time to key the driveshafts to them.
The next step is to install the shim, bearing, cam/bearing holder assembly and plastic outdrive. Slide them onto the spool assembly and capture with the M2.5x10mm screw. Don’t forget your small dab of threadlocker. An added tip is to orientate both outdrives the same prior to installation. This helps when it comes time to key the driveshafts to them.
Step 5:

Here’s a picture of the completed install from Step 4. Set the spool aside.
Here’s a picture of the completed install from Step 4. Set the spool aside.
Step 6:

Moving on to the rear diff, let’s start by sliding both the larger o-ring onto the outdrive followed by the smaller o-ring. Note that the smaller o-ring fits into the groove just below the pin hole in the outdrive. Apply a liberal amount of black grease to the area as shown.
Moving on to the rear diff, let’s start by sliding both the larger o-ring onto the outdrive followed by the smaller o-ring. Note that the smaller o-ring fits into the groove just below the pin hole in the outdrive. Apply a liberal amount of black grease to the area as shown.
Step 7:

Slide the outdrive assembly into the gear case, making sure the outdrive slips all the way in. Insert one large and one small shim, then feed the diff pin into the hole of the outdrive shaft. Make sure the diff pin is centered in the opening.
Slide the outdrive assembly into the gear case, making sure the outdrive slips all the way in. Insert one large and one small shim, then feed the diff pin into the hole of the outdrive shaft. Make sure the diff pin is centered in the opening.
Step 8:

Install the sun gear, keying the backside of the gear to the pin. Note the outdrive is flush with the top of the sun gear.
Install the sun gear, keying the backside of the gear to the pin. Note the outdrive is flush with the top of the sun gear.
Step 9:

Build a pair of planetary gears assemblies as shown, keying the notches in the diff pins to each other.
Build a pair of planetary gears assemblies as shown, keying the notches in the diff pins to each other.
Step 10:

Slide the planetary gear assemblies into the diff housing as shown, spinning the outdrive to make sure all the gears seat correctly. This is also a good time to install the diff gasket as well.
Slide the planetary gear assemblies into the diff housing as shown, spinning the outdrive to make sure all the gears seat correctly. This is also a good time to install the diff gasket as well.
Step 11:

Using Steps 6-8, assemble the pulley side of the diff.
Using Steps 6-8, assemble the pulley side of the diff.
Step 12:

Fill the diff housing up with the 3000wt diff fluid until it’s just above the cross pins. Carefully flip and mate the two diff halves and screw together using the 2.5x6mm screws. Do not overtighten these screws; you just want them snug. Spin the outdrives to make sure everything feels silky smooth in the diff.
Fill the diff housing up with the 3000wt diff fluid until it’s just above the cross pins. Carefully flip and mate the two diff halves and screw together using the 2.5x6mm screws. Do not overtighten these screws; you just want them snug. Spin the outdrives to make sure everything feels silky smooth in the diff.
Step 13:

Like the front, install the diff shim, bearing and cam assembly. Note the assembly and it’s #7 position – you’ll see I marked it with the silver Sharpie for reference.
Like the front, install the diff shim, bearing and cam assembly. Note the assembly and it’s #7 position – you’ll see I marked it with the silver Sharpie for reference.
Step 14:

And there you go – an assembled front spool and rear gear differential ready to be installed. Set them aside. Great job!
And there you go – an assembled front spool and rear gear differential ready to be installed. Set them aside. Great job!
Team Associated TC7 Build – Part 1 – Shocks
Team Associated TC7 Build – Part 2 – Spool and Differential
Team Associated TC7 Build – Part 3 – Suspension
Team Associated TC7 Build – Part 4 – Center Bulkhead / Top Deck
Team Associated TC7 Build – Part 5 – Drivetrain
Team Associated TC7 Build – Part 6 – Shocks, Bumpers, Body Mounts
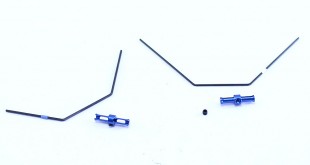
Team Associated TC7 Build – Part 7 – Anti-Roll Bar
Team Associated TC7 Build – Part 8 – Electronics