The Build – Part 8
I am lucky enough to not only get one of Team Associated’s TC7s, I’m also able to load it up with a full set of Reedy electronics! In addition, I’ll be installing an XP servo and Futaba radio system. Oh so good…
 You might notice that my build started off with 48P gears but towards the end swapped over to 64P. I did this for the simple reason that, with a 13.5T motor, trying to get to the ‘suggested’ 4.1-4.5 gear ratio was becoming quite the chore. I have WAY more 64P gears than I do 48P, so I figured I’d switch to make life easier.
The first order on the bench is to get the XP DS1313 servo connected and installed. Assemble and attach the servo horn as well as the pair of servo mounts. Leave the screws slightly loose on the mounts for now, and leave off the antenna mount for the time being.

The manual shows the carbon fiber floating servo mount going on later, but that poses a problem unless you want to remove the top deck. I didn’t, so I assembled and installed it now. Once the mount is attached, you can tighten up the servo mount screws from the last step.

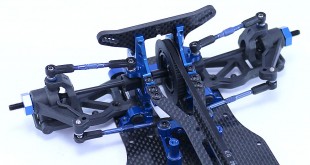
Before sliding the servo onto the chassis, install the aluminum servo spacers over the servo posts now. Slide the servo assembly into place and attach to the chassis. Two screws are used to attach the floating servo mount to the servo posts, capturing the spacers. Don’t forget the screw that attaches this assembly to the top deck. It’s also time to attach the antenna mount. Note that the opening for the antenna is extremely close to the servo, so you might want to leave this screw loose until you’ve fed the antenna through the opening.

Attach the motor. You might also notice the 64P gears instead of the kit supplied 48P. Read the above notes for more info on that.

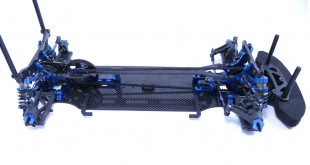
Install the receiver and ESC and wire everything up. It’s a bit compact on the chassis but as you can see there’s room for a clean install.

The TC7 requires tape to hold the battery in place. To use, simply form a hoop around the mount and attach the tape to itself. I use MuchMore’s reinforced tape to keep my battery firmly planted.

Drop your battery in, wire up the power plugs and boom … you’re ready to rock!
Congratulations! You’ve wrapped up your brand new Team Associated TC7!
Now, if you’re like me, you can’t wait to get this baby out on the track. I would install some tires and do a bench test to make sure everything is working and there are no problems prior to putting it out on the track!
I’ve also listed a few items you’ll need to complete at the bottom – bodies and tires.
Team Associated TC7 Build – Part 1 – Shocks
Team Associated TC7 Build – Part 2 – Spool and Differential
Team Associated TC7 Build – Part 3 – Suspension
Team Associated TC7 Build – Part 4 – Center Bulkhead / Top Deck
Team Associated TC7 Build – Part 5 – Drivetrain
Team Associated TC7 Build – Part 6 – Shocks, Bumpers, Body Mounts
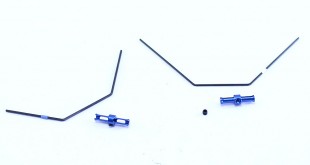
Team Associated TC7 Build – Part 7 – Anti-Roll Bar
Team Associated TC7 Build – Part 8 – Electronics
Back to the Team Associated TC7 Build List