The Build – Part 11
Installing the engine and fuel tank are pretty easy. We will also be covering the assembly of the clutch to the engine which can be a little more detailed. Your clutch build may be different for the engine you use.
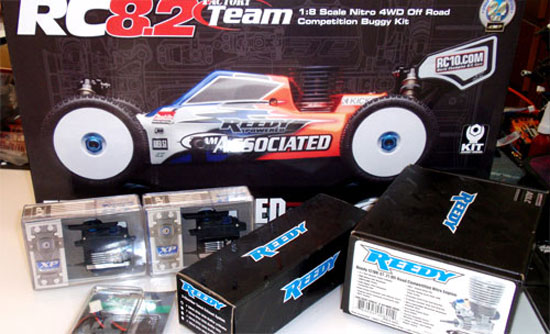
Build Notes: The engine assembly steps are for the Reedy 121VR-ST .21 Competition Engine. Your assembly may differ slightly.
Prepping the air filter requires the use of a somewhat sticky filter oil. Have some clean-up rags handy and wash your hands with soap and water after this step.
Team Associated RC8.2 Build Step 151
Let’s start off by installing the zip ties to the tank lid. This will help us open the lid while the body is still on for refueling. Attach as shown…
Team Associated RC8.2 Build Step 152
…and cut off the excess on one of the zip ties.
Team Associated RC8.2 Build Step 153
Some tracks regulate the amount of fuel your tank can hold. To stay ‘legal’, install the fuel spacer into the bottom of the tank. If your track doesn’t care, leave it out.
Team Associated RC8.2 Build Step 154
Next, attach the fuel tank mounts to the chassis and slide a red o-ring over the top. This o-ring helps cushion the tank.
Team Associated RC8.2 Build Step 155
Now slide the tank into position and clip into place. Note the direction of the lid. It might seem backwards, but remember you are pulling the lid open from the zip tie. That zip ties need to protrude out of the body.
Team Associated RC8.2 Build Step 156
Ok, now for the fun part. Remove the air filter and all the parts associated with it. Set them out as shown. KEEP THE BAG!
Team Associated RC8.2 Build Step 157
Squeeze all of the air filter oil into the bag. Take the hollow portion of the air filter (the white one) and drop it into the bag.
Team Associated RC8.2 Build Step 158
Sponge it around really good to coat it entirely with the filter oil. The finished product should look like this.
Team Associated RC8.2 Build Step 159
Remove the filter from the bag and assemble the complete air filter. Notice you didn’t make too much of a mess, right? You can throw that bag out now.
Team Associated RC8.2 Build Step 160
Attach the assembled air filter to the air filter hose. Use one of the long zip ties included and cinch it into place.
Team Associated RC8.2 Build Step 161
Take your engine out and set it aside. The Reedy 121VR-ST .21 Competition Engine comes with a slew of additional items, like air restrictors, head shims, pipe springs, gaskets, etc. Each engine might be different so for this step lets just say you’ve assembled your engine and it’s ready to install.
Team Associated RC8.2 Build Step 162
Attach the air filter to the carburetor using another of the long zip ties included. Rotate it so that the filter is on the right side of the engine.
Team Associated RC8.2 Build Step 163
The flywheel is next. Slide the collet and flywheel into place. Screw on the clutch nut and tighten down. Go ahead and use your gorilla strength on this one. We want this tight!
Team Associated RC8.2 Build Step 164
Slide the clutch shim onto the flywheel. Drop the clutch shoes into place and attach the clutch springs. This can be a little tricky so take your time. Watch your fingers also!
Team Associated RC8.2 Build Step 165
Here’s a close-up of the shoes and springs attached. This should give you a better idea of how they attach.
Team Associated RC8.2 Build Step 166
Now the clutch bell. Install both bearings into the clutch bell and slide onto the crankshaft after the shim. Load up three more thin shims, the thick shim and the screw. Again, this step might be slightly different depending on the engine you are using.
Team Associated RC8.2 Build Step 167
Attach both engine mounts to the engine. Loctite the screws into place.
Team Associated RC8.2 Build Step 168
Remove your pipe and set the pieces aside as shown. The pipe assembly steps might vary slightly depending on the pipe system you are using. We’re rocking the Reedy EFRA approved Muffler and Header.
Team Associated RC8.2 Build Step 169
Attach the header gasket to the engine and slide the header into place. Secure with the long spring as shown.
Team Associated RC8.2 Build Step 170
Slide the gasket onto the pipe and slide the pipe into the header.
Team Associated RC8.2 Build Step 171
Secure with the three springs as shown.
Team Associated RC8.2 Build Step 172
Attach the pipe mount to the chassis. Don’t forget a dab of loctite here on the bottom screw and set screw.
Team Associated RC8.2 Build Step 173
Attach the engine mount spacers to the chassis. Loctite these babies also!
Team Associated RC8.2 Build Step 174
Slide the pipe onto the pipe mount wire and rotate the engine into place. You might need to adjust the pipe mount slightly so that there is no tension on it when the engine is located to the chassis. Screw the engine into place. Don’t forget the loctite.
Team Associated RC8.2 Build Step 175
Route the fuel line as instructed and snap the fuel line clips into place. Only use a little more fuel line than is necessary. Nothing is worse than a ton of fuel line in the way when trying to work on your car.
Tony Phalen -
As an avid RC enthusiast, Tony has been building, bashing and racing RC Cars for over 30 years. He has participated in every kind of surface racing events - 1/18 scale trucks, 1/10 scale TC, Rock Racers, Rally - if it had wheels, he's raced it! He's also worked on both sides of the industry fence; collaborating with many major manufacturers (as well as being a sponsored driver) to working for a high-profile industry magazine. During this time he has learned many tricks, tips and techniques and is sharing that knowledge on CompetitionX - the most informative RC website on the internet!

 The engine assembly steps are for the Reedy 121VR-ST .21 Competition Engine. Your assembly may differ slightly.