Tamiya’s new CC-02 transmission features robust gears inside a nice looking housing. One of the cool things about it is that you can build it one of two ways; standard, with gear ratios between 11.09:1 to 17:33.1 or low-speed, with ratios between 18.74:1 to 29.28:1 (both require optional pinions). Best part is – it’s a simple swap of the way the gears install! No additional parts are necessary.
 I suggest deciding on how you want to build your transmission up front; having to pull it apart to re-configure it will require a LOT of screws.
The CC-02 comes with a 0.6 Mod spur gear, however the adapter will allow you to swap to 48P (or even 32P). This should open up a wider range of gears to use.
To help identify the gears, all of them come from the factory with the tooth count printed on them.

Before building, you might want to get your hands on a complete set of CC-02 ball bearings. These will not only help the performance of your rig, the will also be much easier to install during the build. I’m using the bearing kit sold by Tamiya, Part #54910.

As stated in the notes above, you can build the transmission with either standard or low-speed gearing. It’s a simple matter of the build – no additional parts are needed. I’ll be building the transmission with the low-speed setting (I want this thing to crawl, baby!).

The transmission pins come in two lengths; an 8mm and a 10mm. Make sure you pay close attention as to which one goes where during the build.

All righty – first thing to do is assemble the Gear Shaft B. Slip a 10mm pin in the B shaft and slide the gear in place, keying the gear to the pin.

Slip another 10mm pin into the other hole, then key the gear to it.
Since we are building with the low-speed gear set, this will be the 20T gear. If you are building the standard transmission, this will be the 26T gear.

Slide a bearing on both ends of the assembly and use an e-clip to capture as shown (only one side gets captured).

Attach an e-clip to Gear Shaft C and slide a bearing into place.

Insert a 10mm pin into the hole, then slide the 26T gear into place and key to the pin. Add another bearing to the gear-end of the shaft.
This is for the low-speed setup; if you are building the standard transmission, this gear will be the 20T one.

Slide an 8mm pin into Gear Shaft A, then slide the 19T gear into place. Add a bearing to each end.
This gear tends to slip around some, causing the 8mm pin to fall out. A light dab of grease on this pin will help keep it (and the gear) in place.

Slide Gear Shaft A assembly into the gearbox as shown. Make sure that pin doesn’t come sliding out.

Slide Gear Shaft B assembly into place.

Finally, slide Gear Shaft C into place. Set aside for a moment.

The opposite side of the transmission case needs to have two 3mm nuts installed (see red arrows). The one on the left is captured by the 2x6mm screw and 2mm washer. The one on the right can be held in place with a light dab of grease.

Add a light layer of grease to the gears and spin them slowly to coat them. Mate the two transmission halves together and secure with the five screws.

Attach the 83T spur gear to the spur gear mount. Do not overtighten the screws.

Even though the mount is on this side, this will be the FRONT side of the gear (the part exposed once mounted). While not necessary, it’s a good idea to mount the spur gear with the tooth count facing out to easily identify it.

Slide the spur gear assembly onto the top shaft, then slip a 10mm pin through the hole. Tamiya captures the pin with a 2x6mm screw – smart!

Take the gear cover and insert two more 3mm nuts into it (see red arrows). Again, the left one is captured with a 2x6mm screw and 2mm nut. The right will need a dab of grease to keep it in place.

Attach the gear cover assembly to the transmission; four screws keep it in place (note the different lengths in the manual).

Pop the little cover into place. While not available at this time, I’m guessing Tamiya will be releasing a slipper clutch for the CC-02. This cover can then be removed to externally adjust it.

As we mentioned earlier, we’ll be using a Tekin T35 Heavy Duty brushed motor in the CC-02. Some serious grunt from this thing, especially on 3S!

Slide the pinion gear onto the output shaft and attach the motor assembly to the transmission. One of the great things about this transmission is that the mounting is not typical Tamiya. Usually, there are pre-determined holes for the gearing – Tamiya now includes slots for motor adjustment.
Use the two 3x8mm (and .7mm washers) to secure the motor.

A closer look at the gear mesh – not too tight, not too loose.

Finally, attach the cover – one more 3x8mm screw to hold it in place!
Excellent job on the transmission. It would be interesting to know who built it in standard or low-gear format!!!
Ok, set the transmission aside and let’s move on to Part 2 – the Chassis assembly.
Tamiya CC-02 Trail Truck Build – Opening Page
Tamiya CC-02 Trail Truck Build – Part 1 – Transmission
Tamiya CC-02 Trail Truck Build – Part 2 – Chassis
Tamiya CC-02 Trail Truck Build – Part 3 – Driveshafts
Tamiya CC-02 Trail Truck Build – Part 4 – Front Axle
Tamiya CC-02 Trail Truck Build – Part 5 – Rear Axle
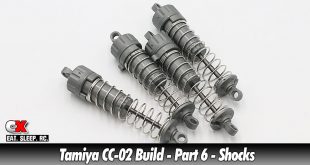
Tamiya CC-02 Trail Truck Build – Part 6 – Shocks
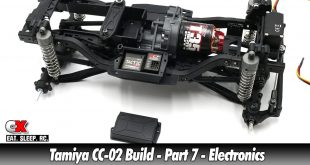
Tamiya CC-02 Trail Truck Build – Part 7 – Electronics
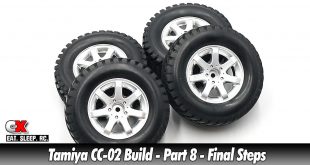
Tamiya CC-02 Trail Truck Build – Part 8 – Final Steps