The next task in our Tekno EB410 build is the front suspension. This includes the steering knuckles, turnbuckles and extremely burly front suspension arms!
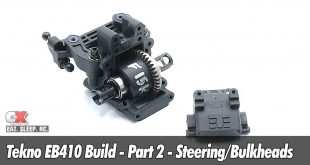
 Tekno’s ballcups are directional, meaning the ballstud can only pop into them from one side. There is a ‘T’ molded into the ballcup; during assembly, make sure the ‘T’ is facing up and you’ll be good to go.
Grab the center-dot down inserts, press them into the ‘B’ arm mount and attach it to the front bulkhead. Note the orientation of the mount; its top/bottom differences are very slight so make sure you have it positioned the right way.

Insert the M4x8mm grub screw through the TOP of the front suspension arms.
You can set the final droop at the end of the build.

Press the hingepin into the ‘B’ mount followed by a 1mm shim, the suspension arm and 2 .5mm shims. Note the orientation of the front arms; make sure the left arm is mounting to the left side of the car, the right arm to the right side of the car.

Press the center-dot insert into the ‘A’ arm mount. Fit the ‘A’ arm mount assembly to the front of the car and secure with the M3x14mm screws. Note the orientation of the arm mount in the picture.

Add a liberal amount of black grease to the ball on the CVA and assemble the drive axles.
Like the rear axles, the fronts don’t require a grub screw to hold the chrome cross pin in place.

Press a 6×12 and 10×15 bearing into the steering arm. Slide the assembled CVA through the steering arm, then slip the 6x10mm shim onto the axle followed by the chrome cross pin through the hole. Insert the grub screw into the wheel hex, slide the hex onto the axle and, after keying the hex to the cross pin, tighten down the grub screw to secure everything in place.

If you’re not paying attention, you can probably miss this step (I did). Insert the M3x4mm screw through two M3x8mm washers and into place on the steering arm.
This is a steering stop screw and help make the car easier to drive. They can be adjusted by the number of washers used; start with the two and experiment as time allows.

Place the left steering arm into the left caster block and secure with the upper and lower kingpin screws. Using a pair of M3x4mm grub screws, carefully thread them into the holes as shown until they come in contact with the kingpin screws. I say carefully because they don’t need to be tight, just enough to make contact.

Attach the steering assembly to the suspension arm, using the hingepin as the swivel point. The M3x4mm screw is used to keep the hingepin in place.
Make sure you attach the left assembly to the left side of the car, the right to the right side.

As a backup, Tekno includes M3x4mm grub screws that feed into the bottom of the steering assembly. DO NOT OVERTIGHTEN – snug is the way to go here.

Final assembly on the steering arms; feed the 8mm ballstud through the steering arm and capture it with the M3 locknut. Don’t forget to use a M3x8mm washer.
Before installing the 8mm ballstud into the inside hole on the caster block, insert the M3x4mm grub screw into the outer hole first. This helps keep the screws holes from deforming during use. Don’t forget the M3x8mm washer under the ballstud.

Build a pair of steering turnbuckles.

Connect the steering turnbuckles as shown. Make sure the notches on the links are pointing to the left side of the car.

Assemble the front ballstud mount. Use the upper hole as shown.

Build a pair of camber turnbuckles and attach them to the ballstud mount. Again, make sure the notches on the turnbuckles are pointed to the left.

Attach the ballstud mount and front shock tower to the front bulkhead. Pop the free end of the turnbuckles onto the ballstuds on the caster blocks.
Another fine job. Your front bulkhead and suspension is now built and ready to be installed onto the chassis. Take a moment to clean up your area and get ready for the next step.
Tekno EB410 Buggy Build – Part 1 – Differentials
Tekno EB410 Buggy Build – Part 2 – Steering and Bulkheads
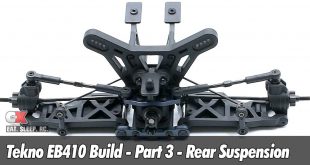
Tekno EB410 Buggy Build – Part 3 – Rear Suspension
Tekno EB410 Buggy Build – Part 4 – Front Suspension
Tekno EB410 Buggy Build – Part 5 – Chassis
Tekno EB410 Buggy Build – Part 6 – Shocks
Tekno EB410 Buggy Build – Part 7 – Final Assembly