The Build – Part 1
I’m going to kick off our TC7 build with the shocks. Team Associated has included a set of FOX shocks with the Genuine Kashima Coating, so you know they’re going to be silky smooth and super consistent! I’m not a fan of shock building so I’m always glad to get this out of the way when I’m pumped about building a kit. Let’s get started.
 Building shocks can be a bit messy. Make sure you have a clean work area and some towels handy to clean up any spilled fluids.
I’ll be filling up the shocks with the included fluid in Step 7 and it’s recommended that you have some sort of shock building station, or at least something suitable to hold them up while the bubbles rise from the oil. I’ve listed a few shock stations at the end of the post that will work just fine.

Before building, I like to lay out all my parts to make sure I have everything. It also makes it easier to build when all the plastic parts are cut off the trees and parts like the pistons have been trimmed and cleane up. The blue paper towel makes it a little easier to see the white and clear parts in the photo.

I also like to install the o-rings into the shock collars first. This makes the o-rings easier to handle, especially if you have shock fluid on your fingers. Go ahead and build all 4.

Per the instructions, I’ll be using the 3-hole pistons. Assemble as shown, making sure to use a tiny bit of blue threadlocker on the button head screw to ensure it doesn’t back out.

Slip the smaller o-ring over the bottom of the Kashima Coated FOX shocks.

Insert the shock shaft assembly into the shock body, apply a small drop of shock oil to the threads on the shaft and install the lower seal parts. Make sure the lower shaft bushing has the lip pointing away from the shock body. Screw on the lower cap and tighten down. Move the shaft up and down and be amazed at how buttery these shocks are.

Install the shock eyelet and pivot ball on the end of each shock.

Screw on the shock collar about half way up on each shock. Fill each shock up to the top with fluid, then slowly move the shaft up and down to release any bubbles from under the piston. Set the filled shock into your shock station (you do have some sort of shock-building station, don’t you?) and let sit for a few minutes until all the bubbles have disappeared. You can see the fine bubbles still floating to the top in the picture.

Pop a pivot ball into each of the plastic shock caps.

The TC7 uses blue springs on all four corners. Slide the blue shrink wrap onto the springs and use a heat source to shrink them in place. Funny, every touring car since the TC3 has come with blue springs.

Place the clear bladder onto the top of the shock – if done right, this should displace a little oil and sit neatly on top of the shock just like the picture. Set the shock cap assembly on top of the bladder and then screw on the aluminum shock cap retainer. Do this slowly so you don’t dislodge the bladder. Tighten all the way down.
To make sure you’ve built them correctly, slowly move the shock shaft up into the body – it should bottom out on (or be close) to the lower shock cap. If it stops early, you have too much oil in the shock and will need to redo this step.

Slide the spring on followed by the lower spring retainer.

There you have it – 4 beautiful Kashima coated FOX shocks, all ready to install on your TC7. We’re not quite ready for them yet, so set them aside and let’s move on to the differentials.
Team Associated TC7 Build – Part 1 – Shocks
Team Associated TC7 Build – Part 2 – Spool and Differential
Team Associated TC7 Build – Part 3 – Suspension
Team Associated TC7 Build – Part 4 – Center Bulkhead / Top Deck
Team Associated TC7 Build – Part 5 – Drivetrain
Team Associated TC7 Build – Part 6 – Shocks, Bumpers, Body Mounts
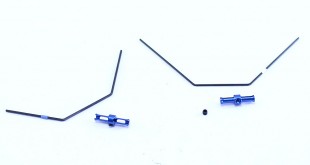
Team Associated TC7 Build – Part 7 – Anti-Roll Bar
Team Associated TC7 Build – Part 8 – Electronics
Back to the Team Associated TC7 Build List