Vaterra Ascender K5 Blazer Build – Part 6 – Assembling the Shocks
The Build – Part 6
Part 6 of our Ascender K5 build has us assembling the shocks. Vaterra was nice enough to give us some good, threaded shocks that are easy to build and work great. On to the build.
Build Notes: The shocks go together very easily, however I think the oil supplied is a bit thick (or the holes in the piston are too small). The truck handled good but I think a little lighter oil might be the way to go.
I would suggest picking up a pair of shock-building pliers. These pliers grab the shaft while preventing any mars or knicks on it, possibly causing the shaft to rip the internal o-rings. I’ve listed a few at the end of the article if you’re interested in picking some up.
Vaterra 1986 Chevrolet K5 Blazer Ascender Build Step 96
Let’s start by assembling the shock shafts and pistons. Build 4 as shown, starting with the lower e-clip, the piston and then the upper e-clip.
Vaterra 1986 Chevrolet K5 Blazer Ascender Build Step 97
Press both o-rings into the bottom of the shock. Apply 1 or 2 drops of oil to the center of the o-rings; it will drip down and coat the inner area of both. Capture both with the lower cap. Build 4 of these.
Vaterra 1986 Chevrolet K5 Blazer Ascender Build Step 98
Pop the ball into each shock rod end. Build 4 of these.
Vaterra 1986 Chevrolet K5 Blazer Ascender Build Step 99
Put a drop of shock oil onto the threads of the shaft and SLOWLY slide it through the shock body. You want to make sure the threaded part of the shaft doesn’t catch on the o-rings and rip them. Once through, slide the bump spacer onto the shaft and screw on the rod end. Here is where a pair of shock-building pliers come in handy. You don’t want to scratch the shaft or it could rip the o-rings.
Vaterra 1986 Chevrolet K5 Blazer Ascender Build Step 100
Thread the pre-load retainer onto the shock. We will use this to hold the shocks in our shock station while the bubbles rise out of the oil.
Vaterra 1986 Chevrolet K5 Blazer Ascender Build Step 101
We want to also assemble our caps now as well. Pop the balls into the caps, then seat the o-ring into the grooves inside the caps. Make sure the o-ring is all the way down inside so it doesn’t get pinched.
Vaterra 1986 Chevrolet K5 Blazer Ascender Build Step 102
Fill the shocks with oil all the way to the top. SLOWLY slide the shock shaft up, allowing the air under the piston to escape. This will also lower the level of the oil, so refill to the top; flat with the top of the body is fine. Set aside all the air bubbles can escape the shock; typically only a few minutes.
Vaterra 1986 Chevrolet K5 Blazer Ascender Build Step 103
To bleed these shocks, I found the easiest way was to hold the shock against your workspace and SLOWLY compress it. Oil will spill out of the top as the piston rises up, so make sure you have a few paper towels down first.
Vaterra 1986 Chevrolet K5 Blazer Ascender Build Step 104
Once it is fully compressed, screw the cap on. A little more oil might escape, but that’s ok. Tighten the cap down and then wipe the excess oil off the shock. Build 4 of these.
Vaterra 1986 Chevrolet K5 Blazer Ascender Build Step 105
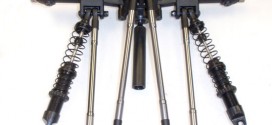
Install the short spring followed by the mid-spring retainer, the longer spring and then the lower spring retainer. You may need to adjust your pre-load retainers up a bit, but just make sure they are all the same.
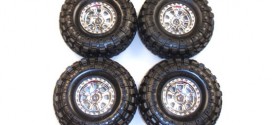
There you have it; 4 expertly built shocks ready to install!
As I mentioned above, here are a few examples of shock shaft pliers as well as shock stands.
Tony Phalen -
As an avid RC enthusiast, Tony has been building, bashing and racing RC Cars for over 30 years. He has participated in every kind of surface racing events - 1/18 scale trucks, 1/10 scale TC, Rock Racers, Rally - if it had wheels, he's raced it! He's also worked on both sides of the industry fence; collaborating with many major manufacturers (as well as being a sponsored driver) to working for a high-profile industry magazine. During this time he has learned many tricks, tips and techniques and is sharing that knowledge on CompetitionX - the most informative RC website on the internet!

 The shocks go together very easily, however I think the oil supplied is a bit thick (or the holes in the piston are too small). The truck handled good but I think a little lighter oil might be the way to go.